Open source basboard clip system
Discover a versatile open-source clip system for mounting baseboards on walls or furniture legs. This 3D-printable solution includes wall clips, custom leg clamps for kitchen cabinets, and a dedicated saw box for precise cuts. Perfect for DIY enthusiasts, with free design files included!
(Free download link to all parts at the end of article)
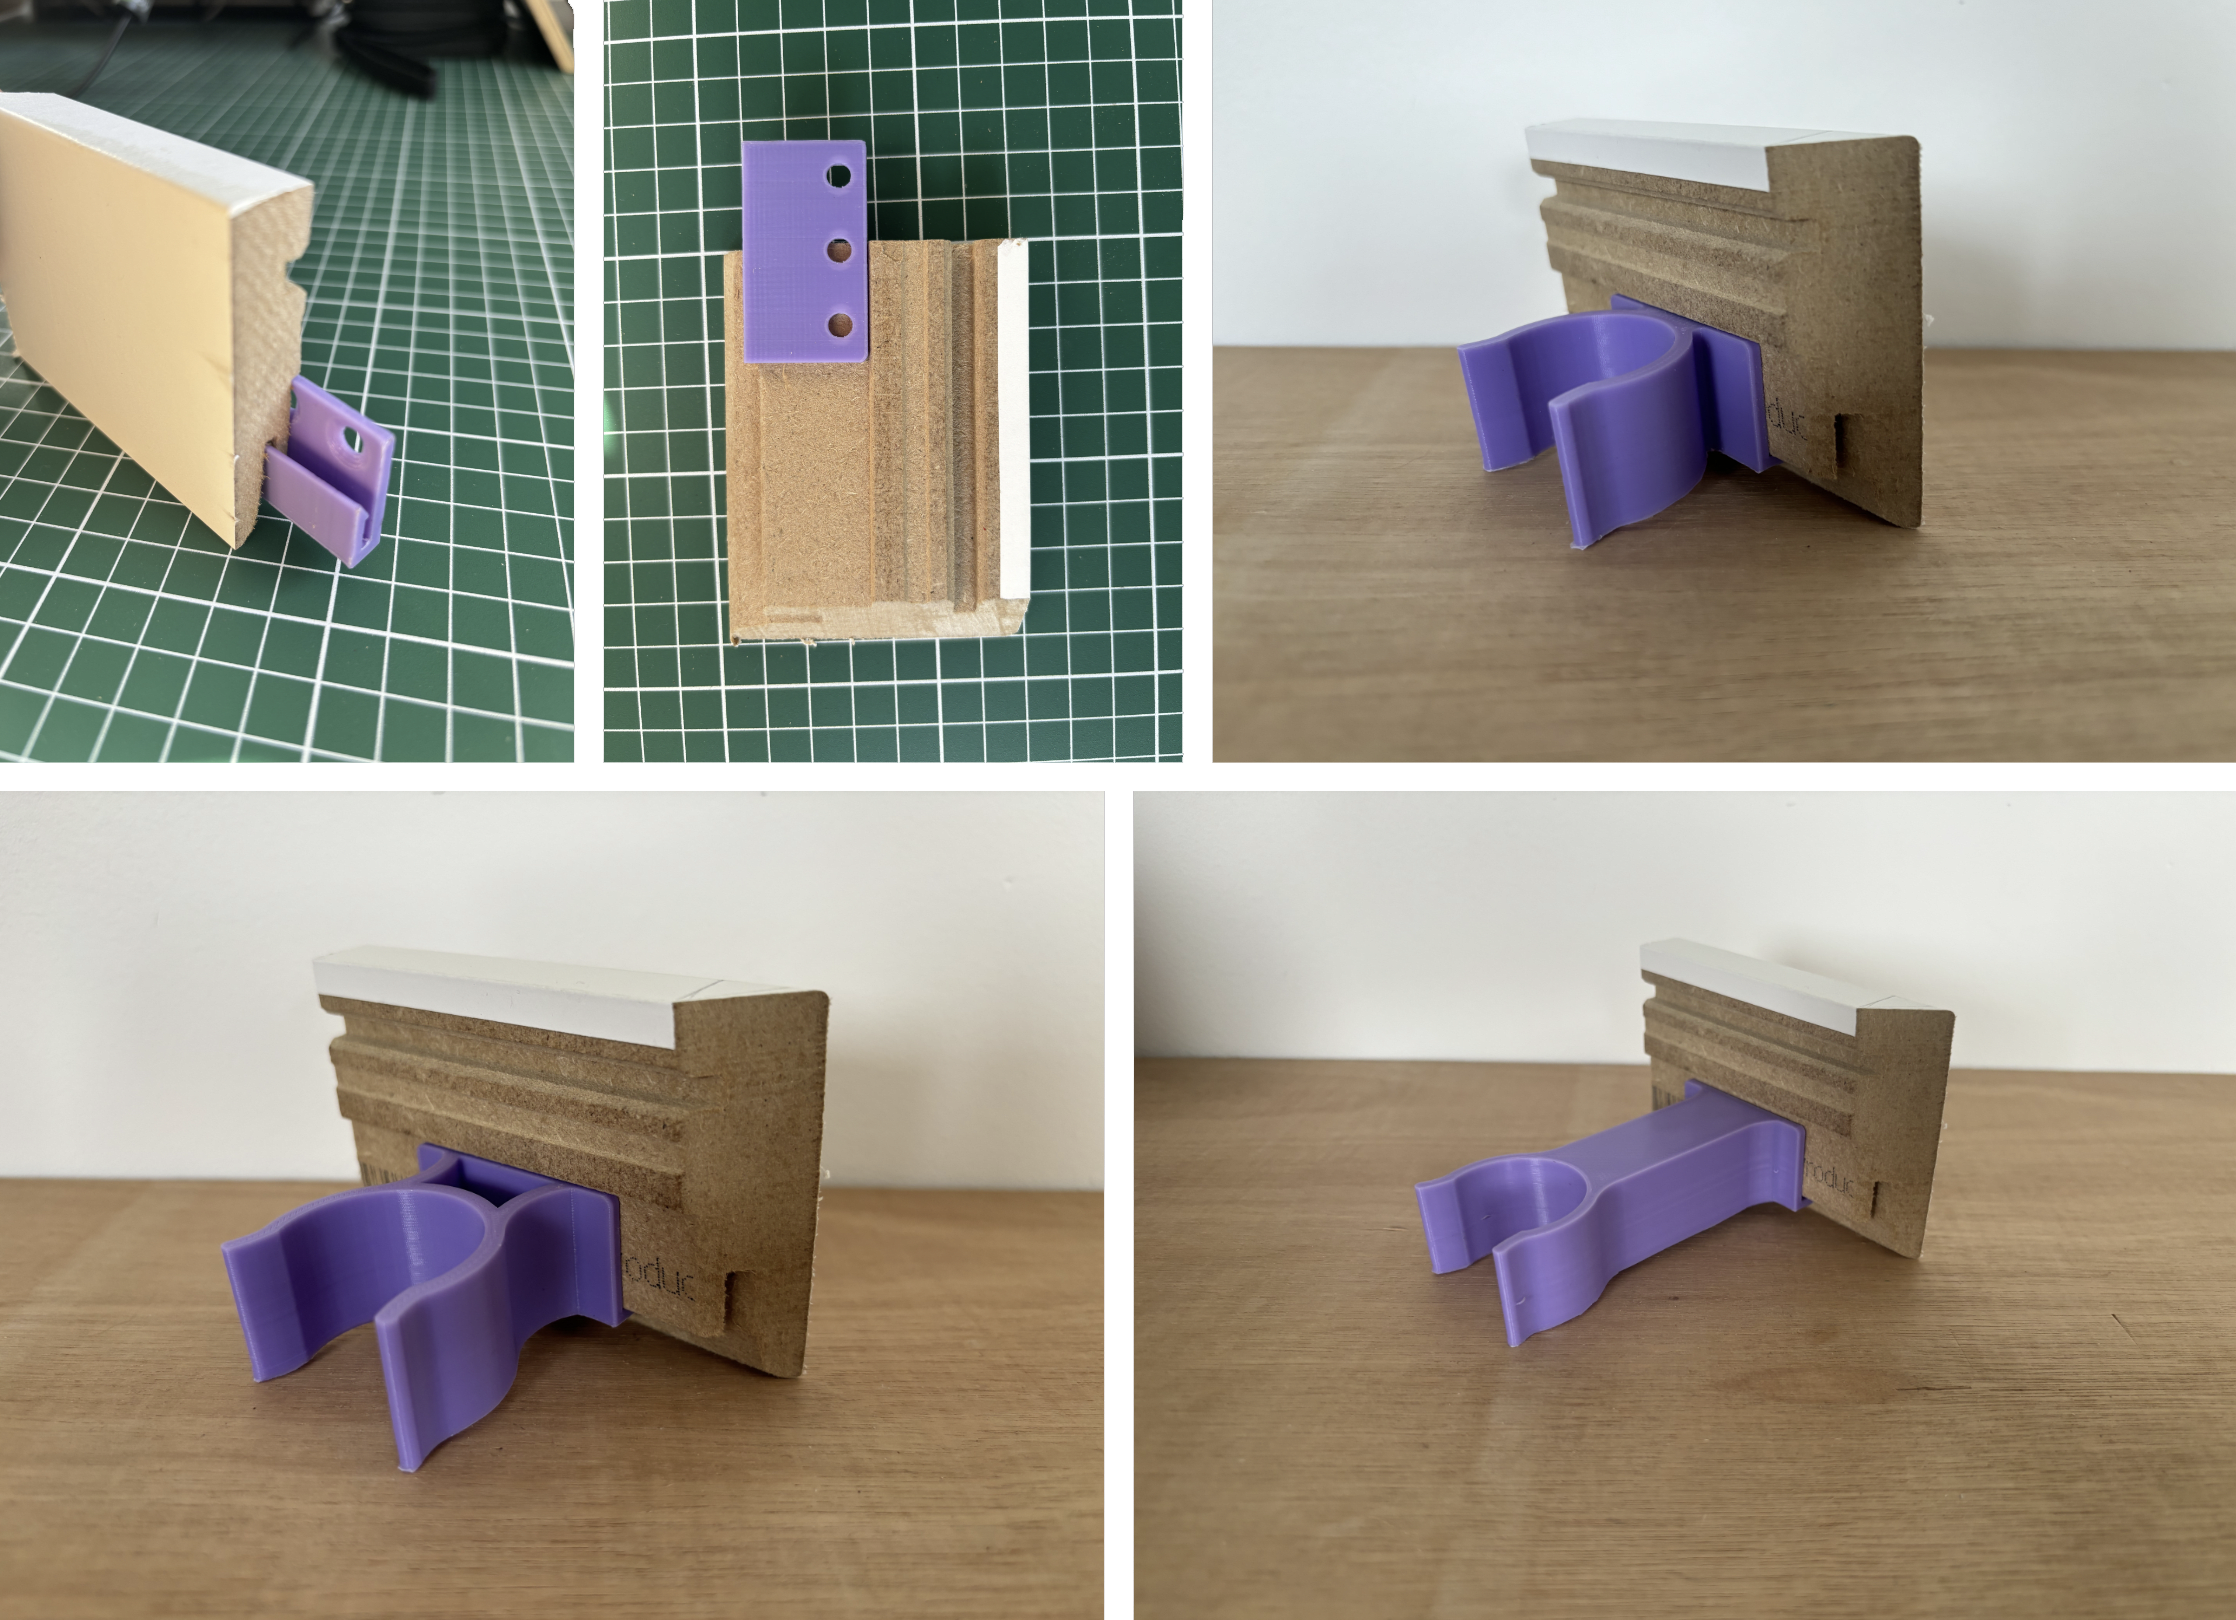
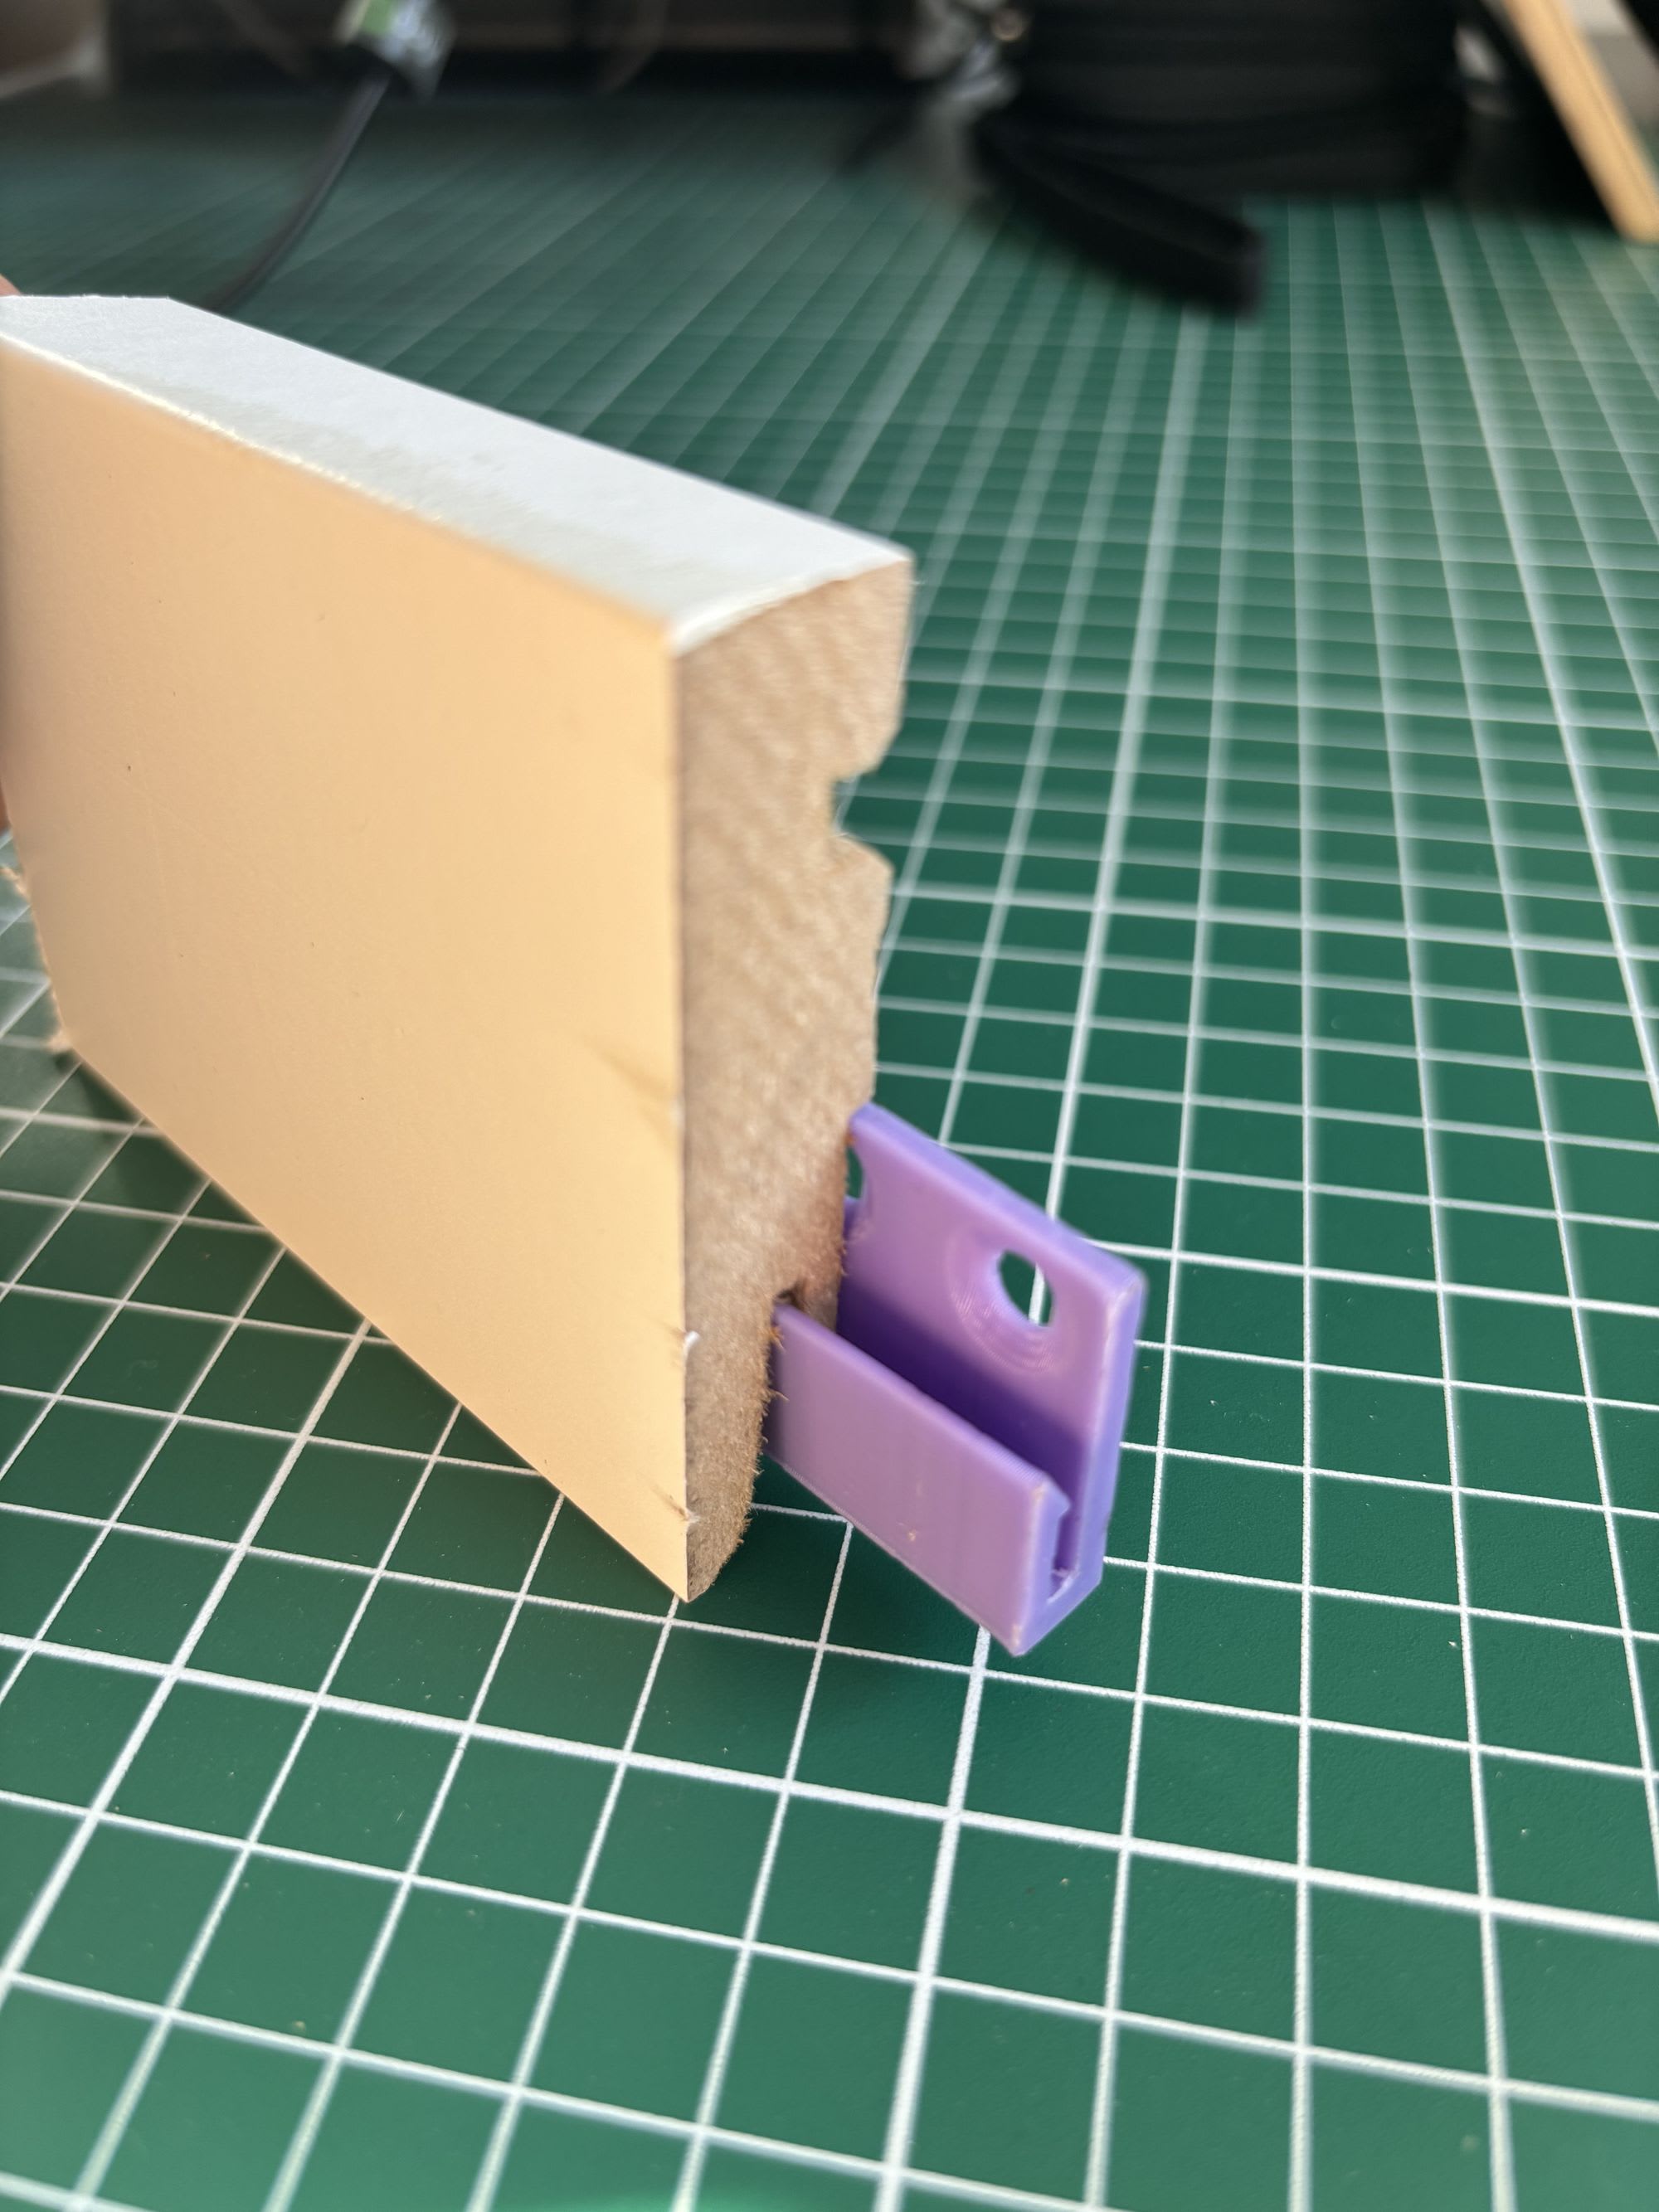
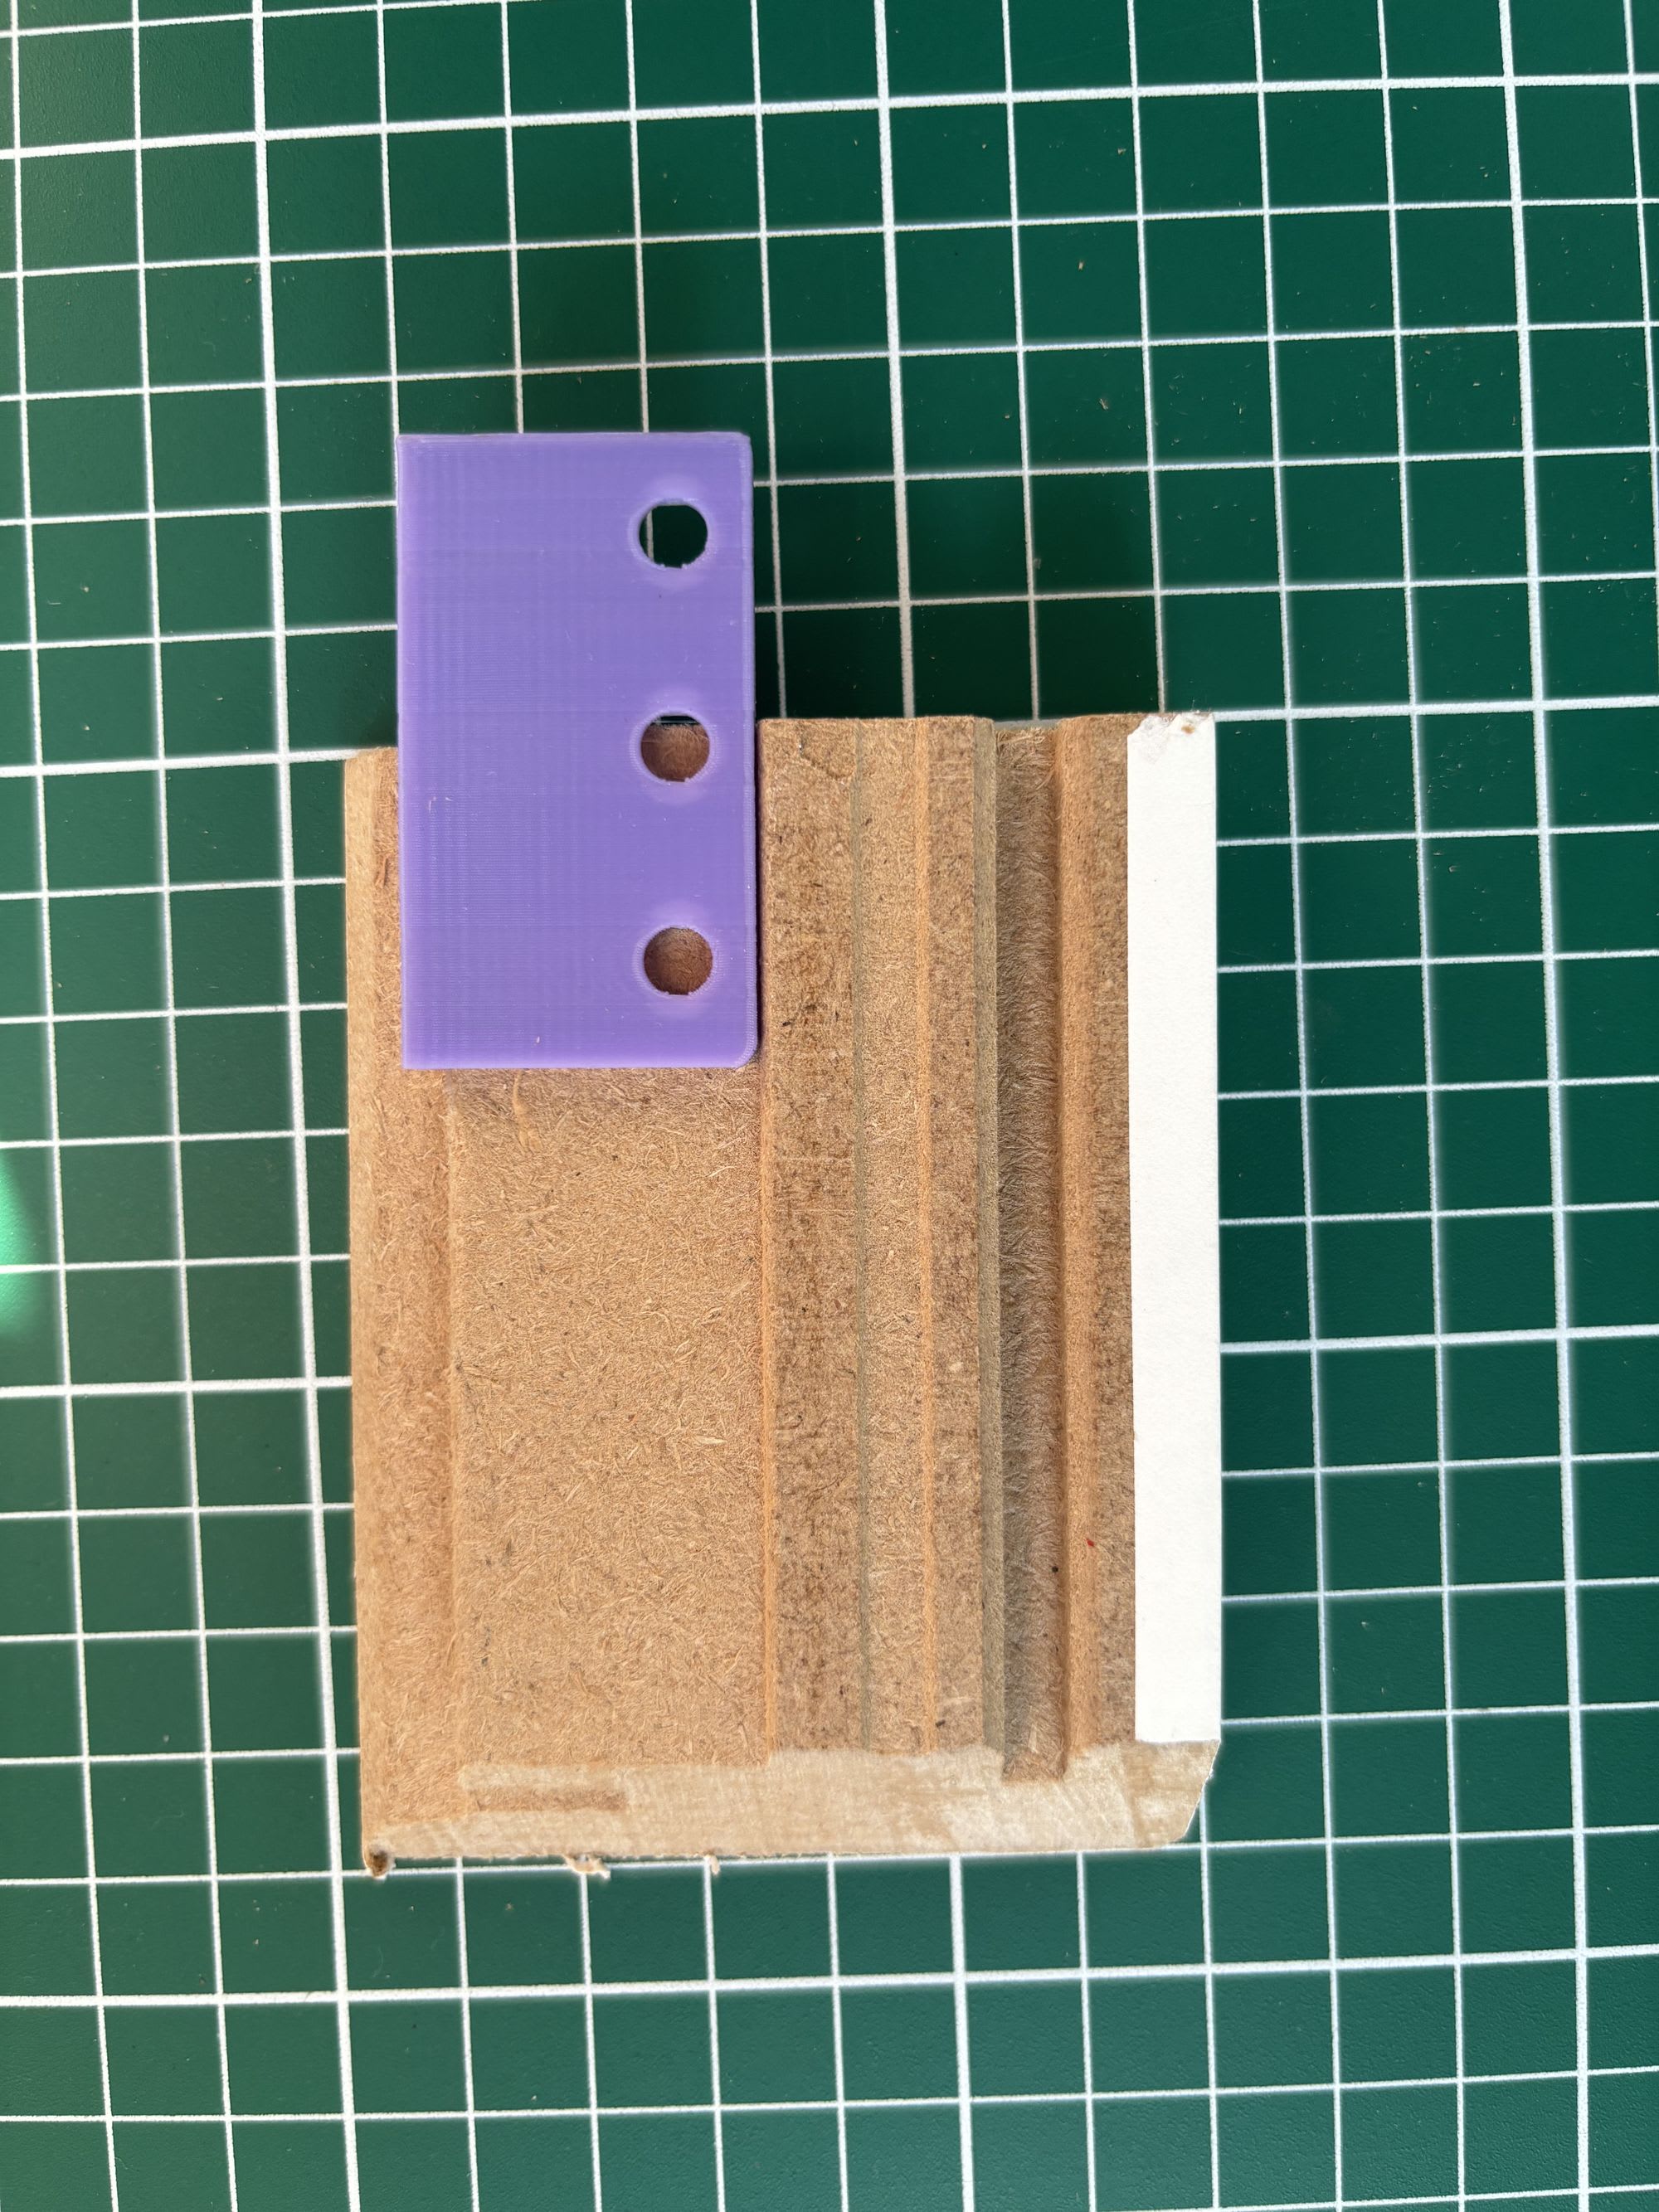
I recently installed baseboards throughout my home and decided to use a clip system. While installing baseboard in all the rooms I ran out of clips... Since they are incredibly simply designed, I decided to just get my caliper and make a 1:1 3D model. This took about 15 minutes, and the first design iteration can be seen on the images below. I printed (purple) PLA+ on an Ender 3 FDM printer, and used straight away to install the rest of the baseboards. I also tried printing some in resin (light gray), as that would speed up the bulk printing significantly, unfortunately the resin I used was too brittle, and all of the clips I tried using snapped and broke when I tried to attach the basboard planks.
For mounting on walls
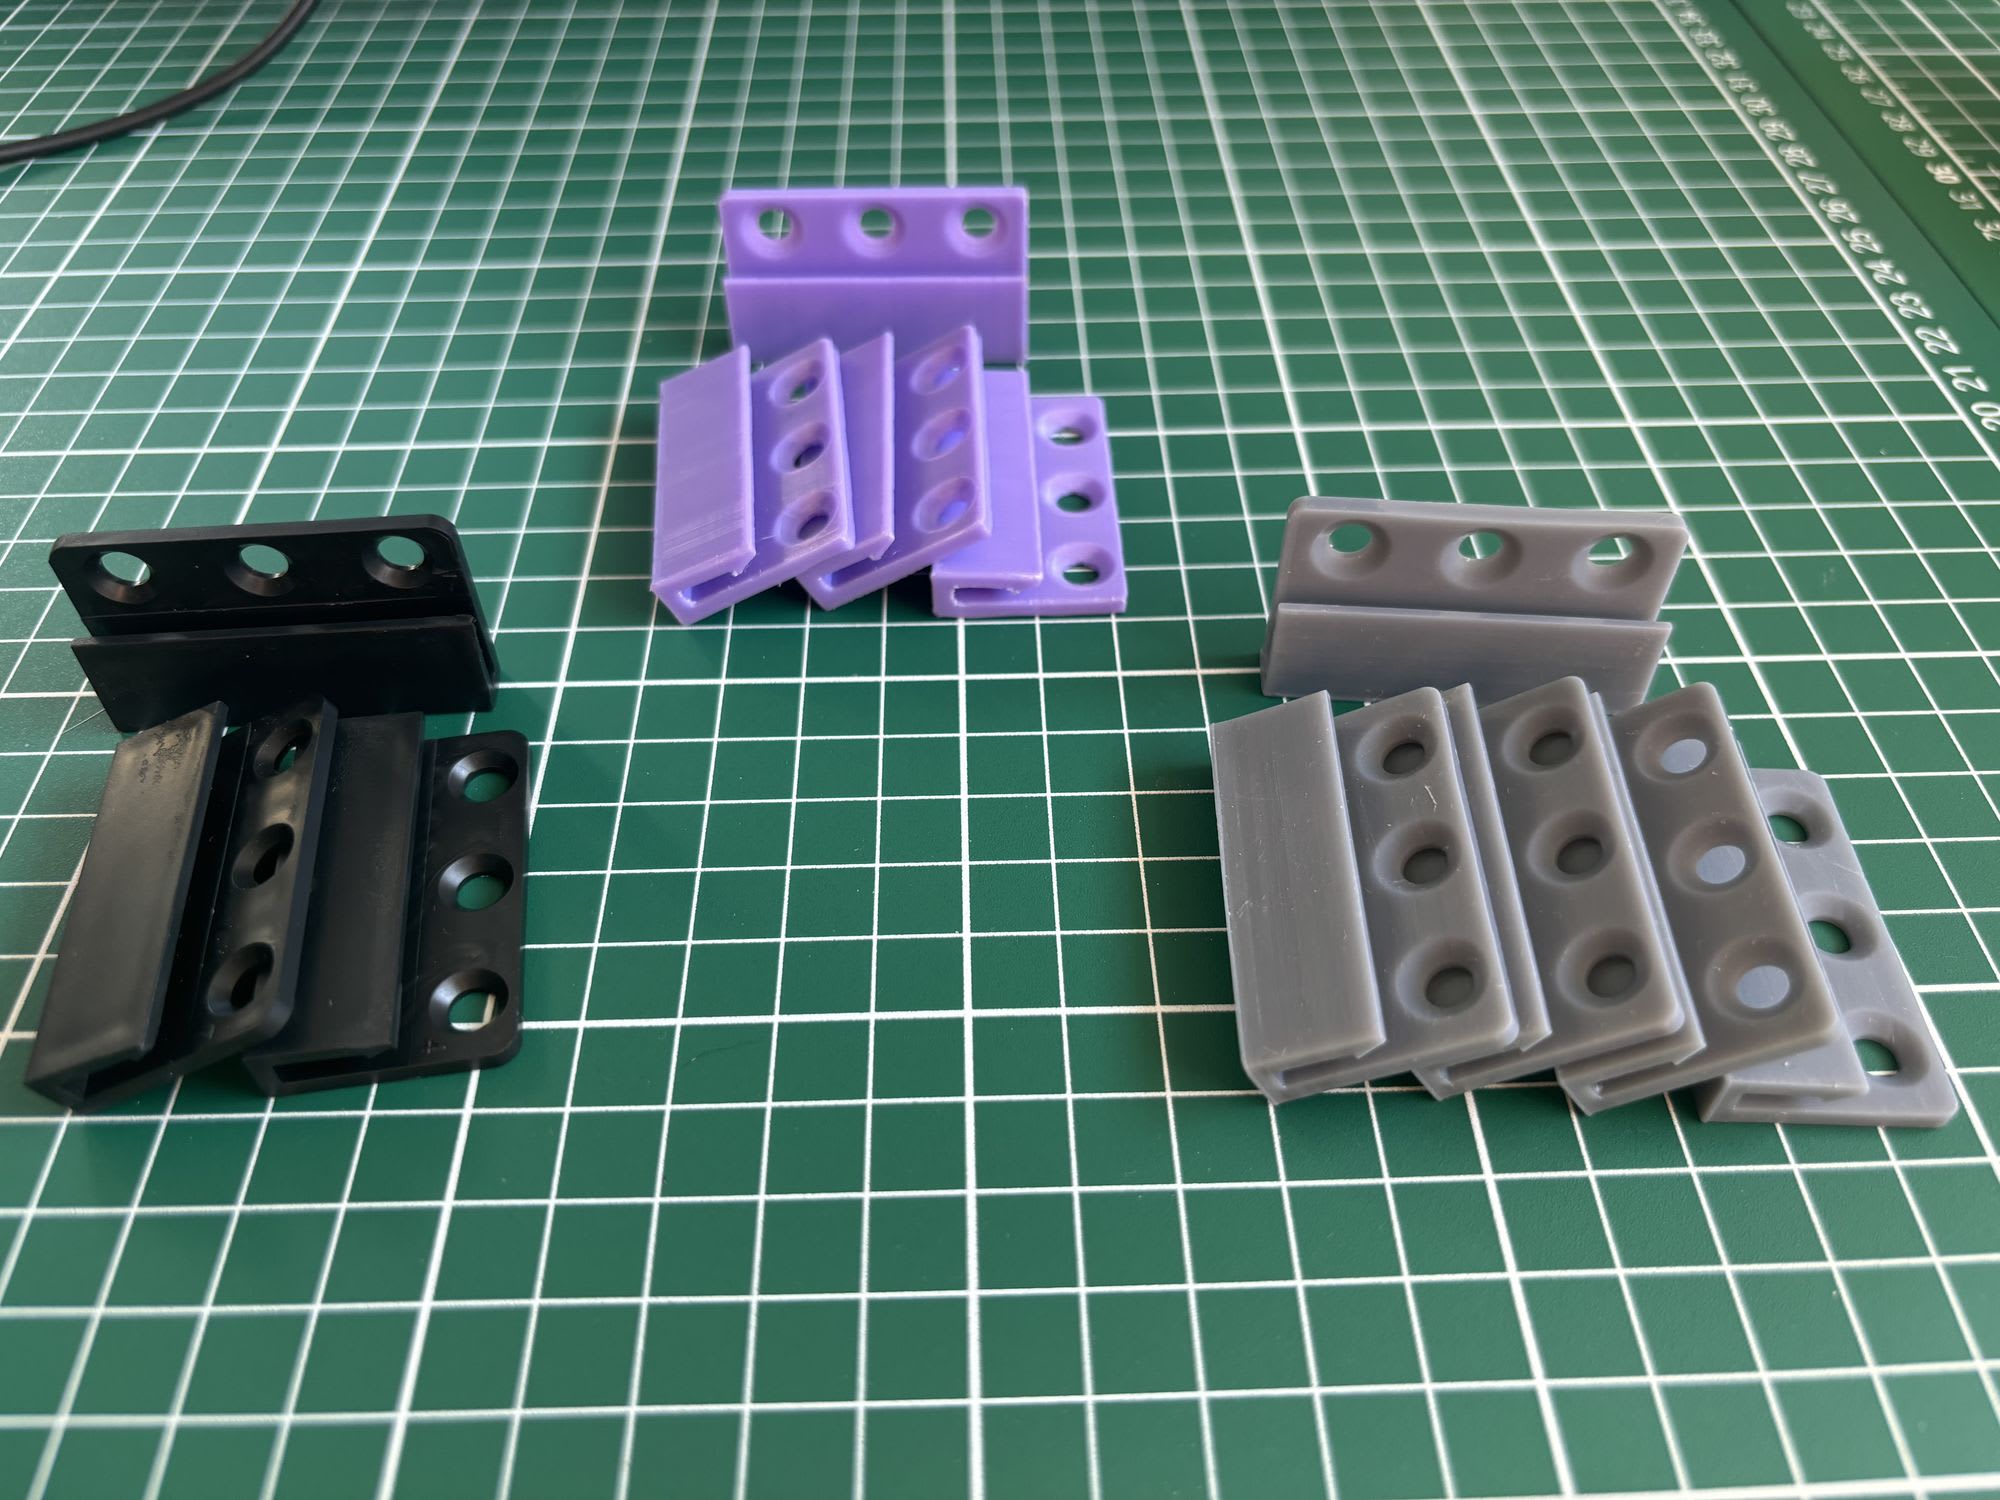
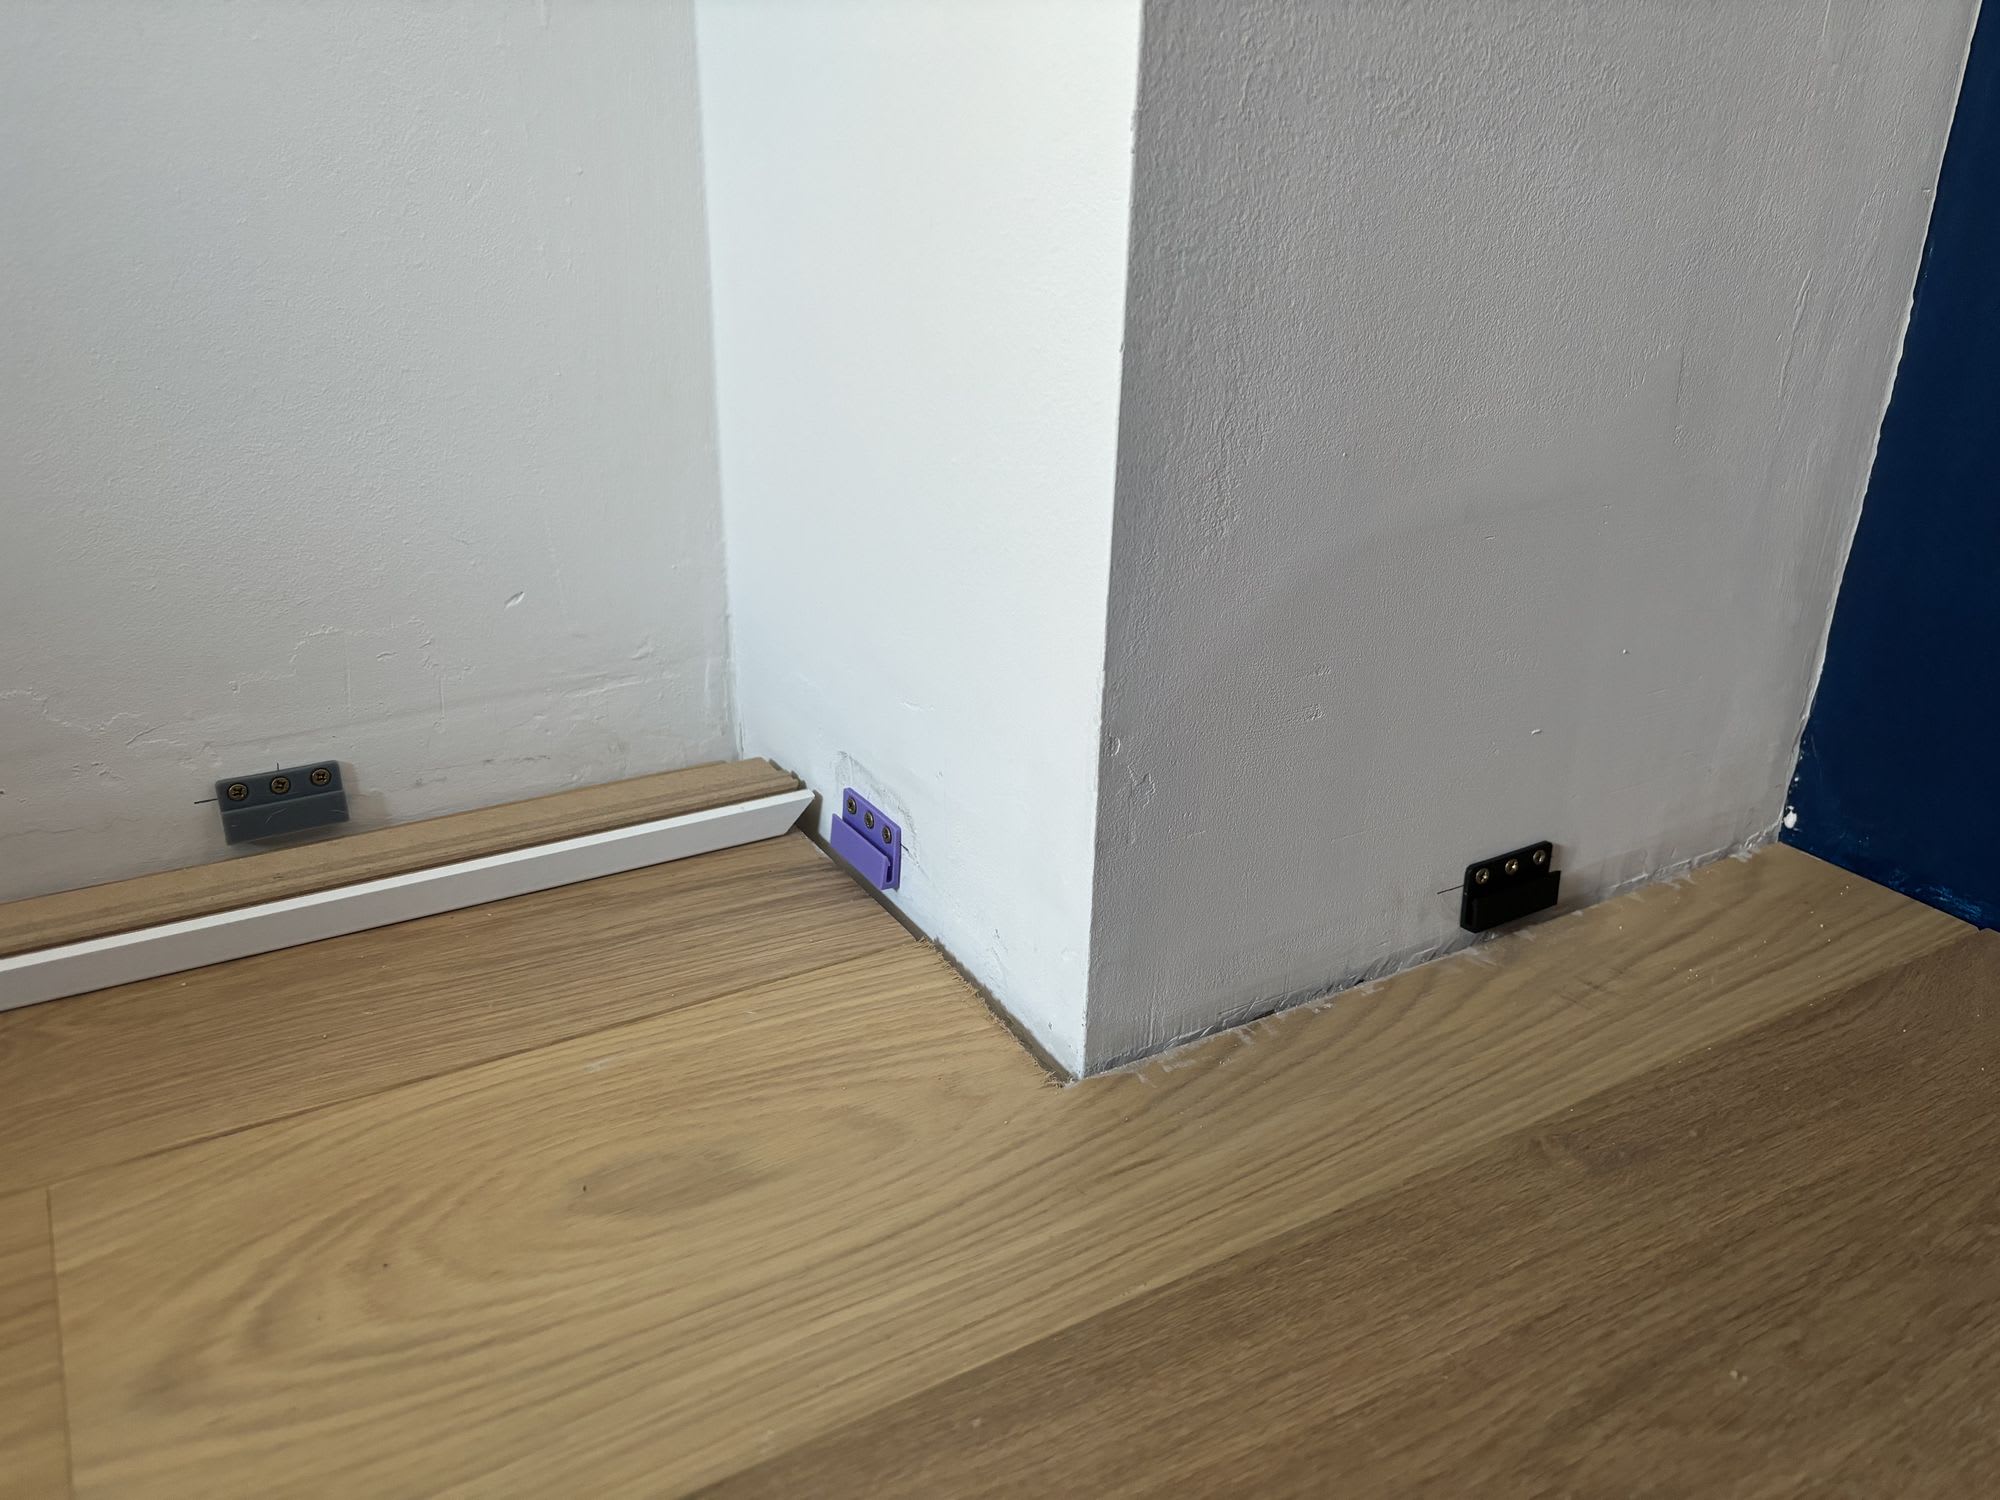

Black = original injection molded
Purple = PLA+ FDM printed
Gray = Resin printed
For mounting on furniture legs
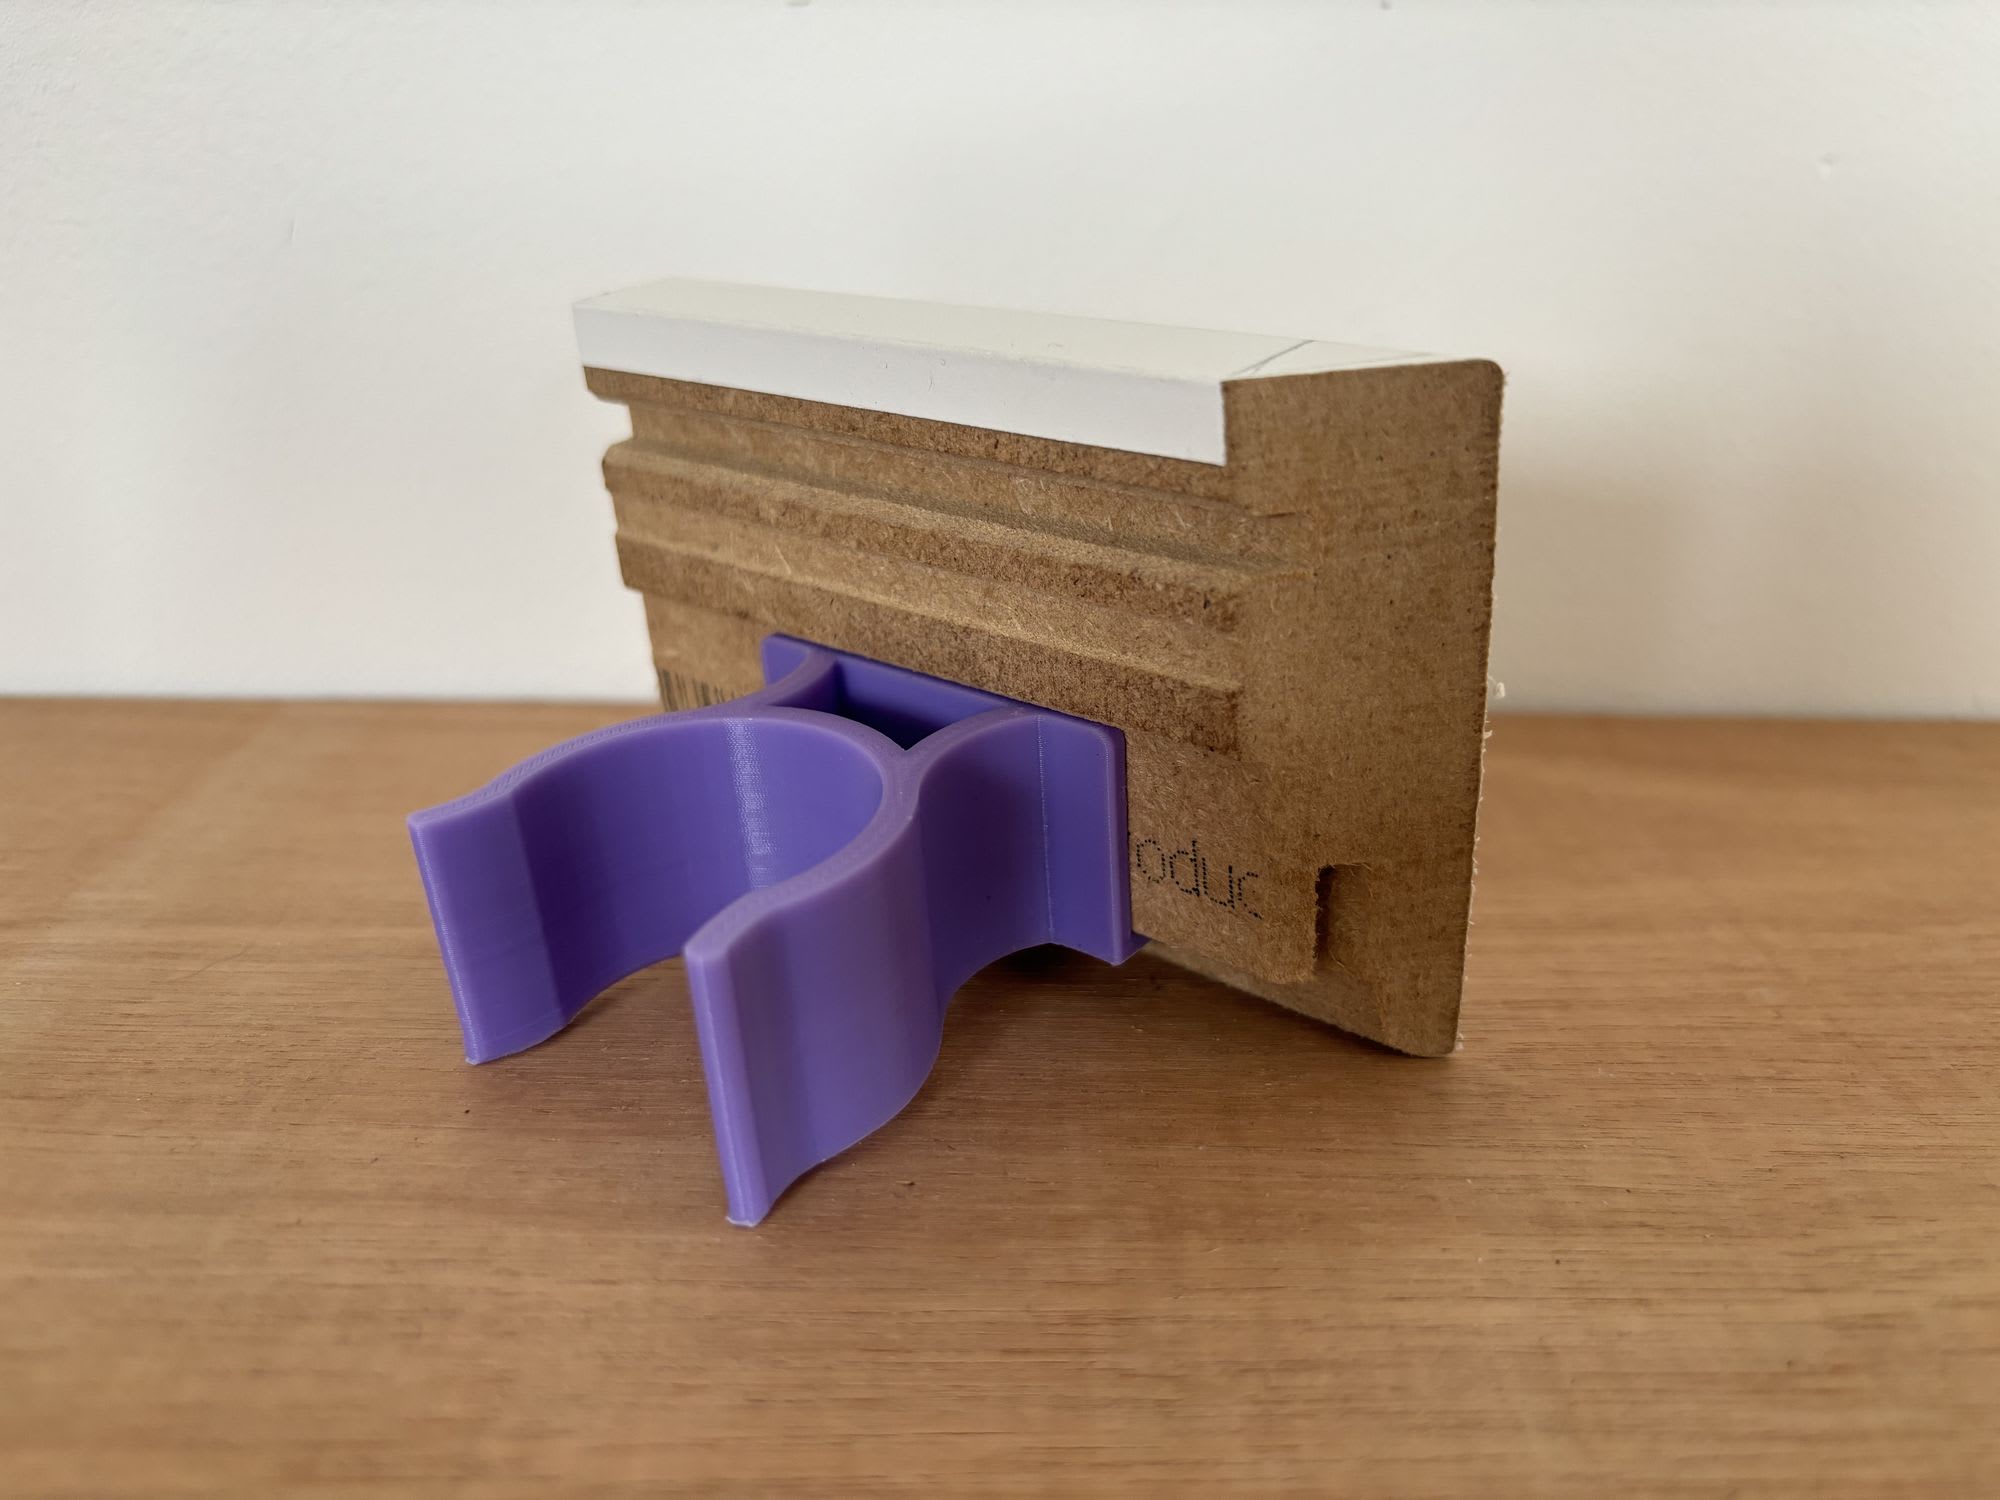
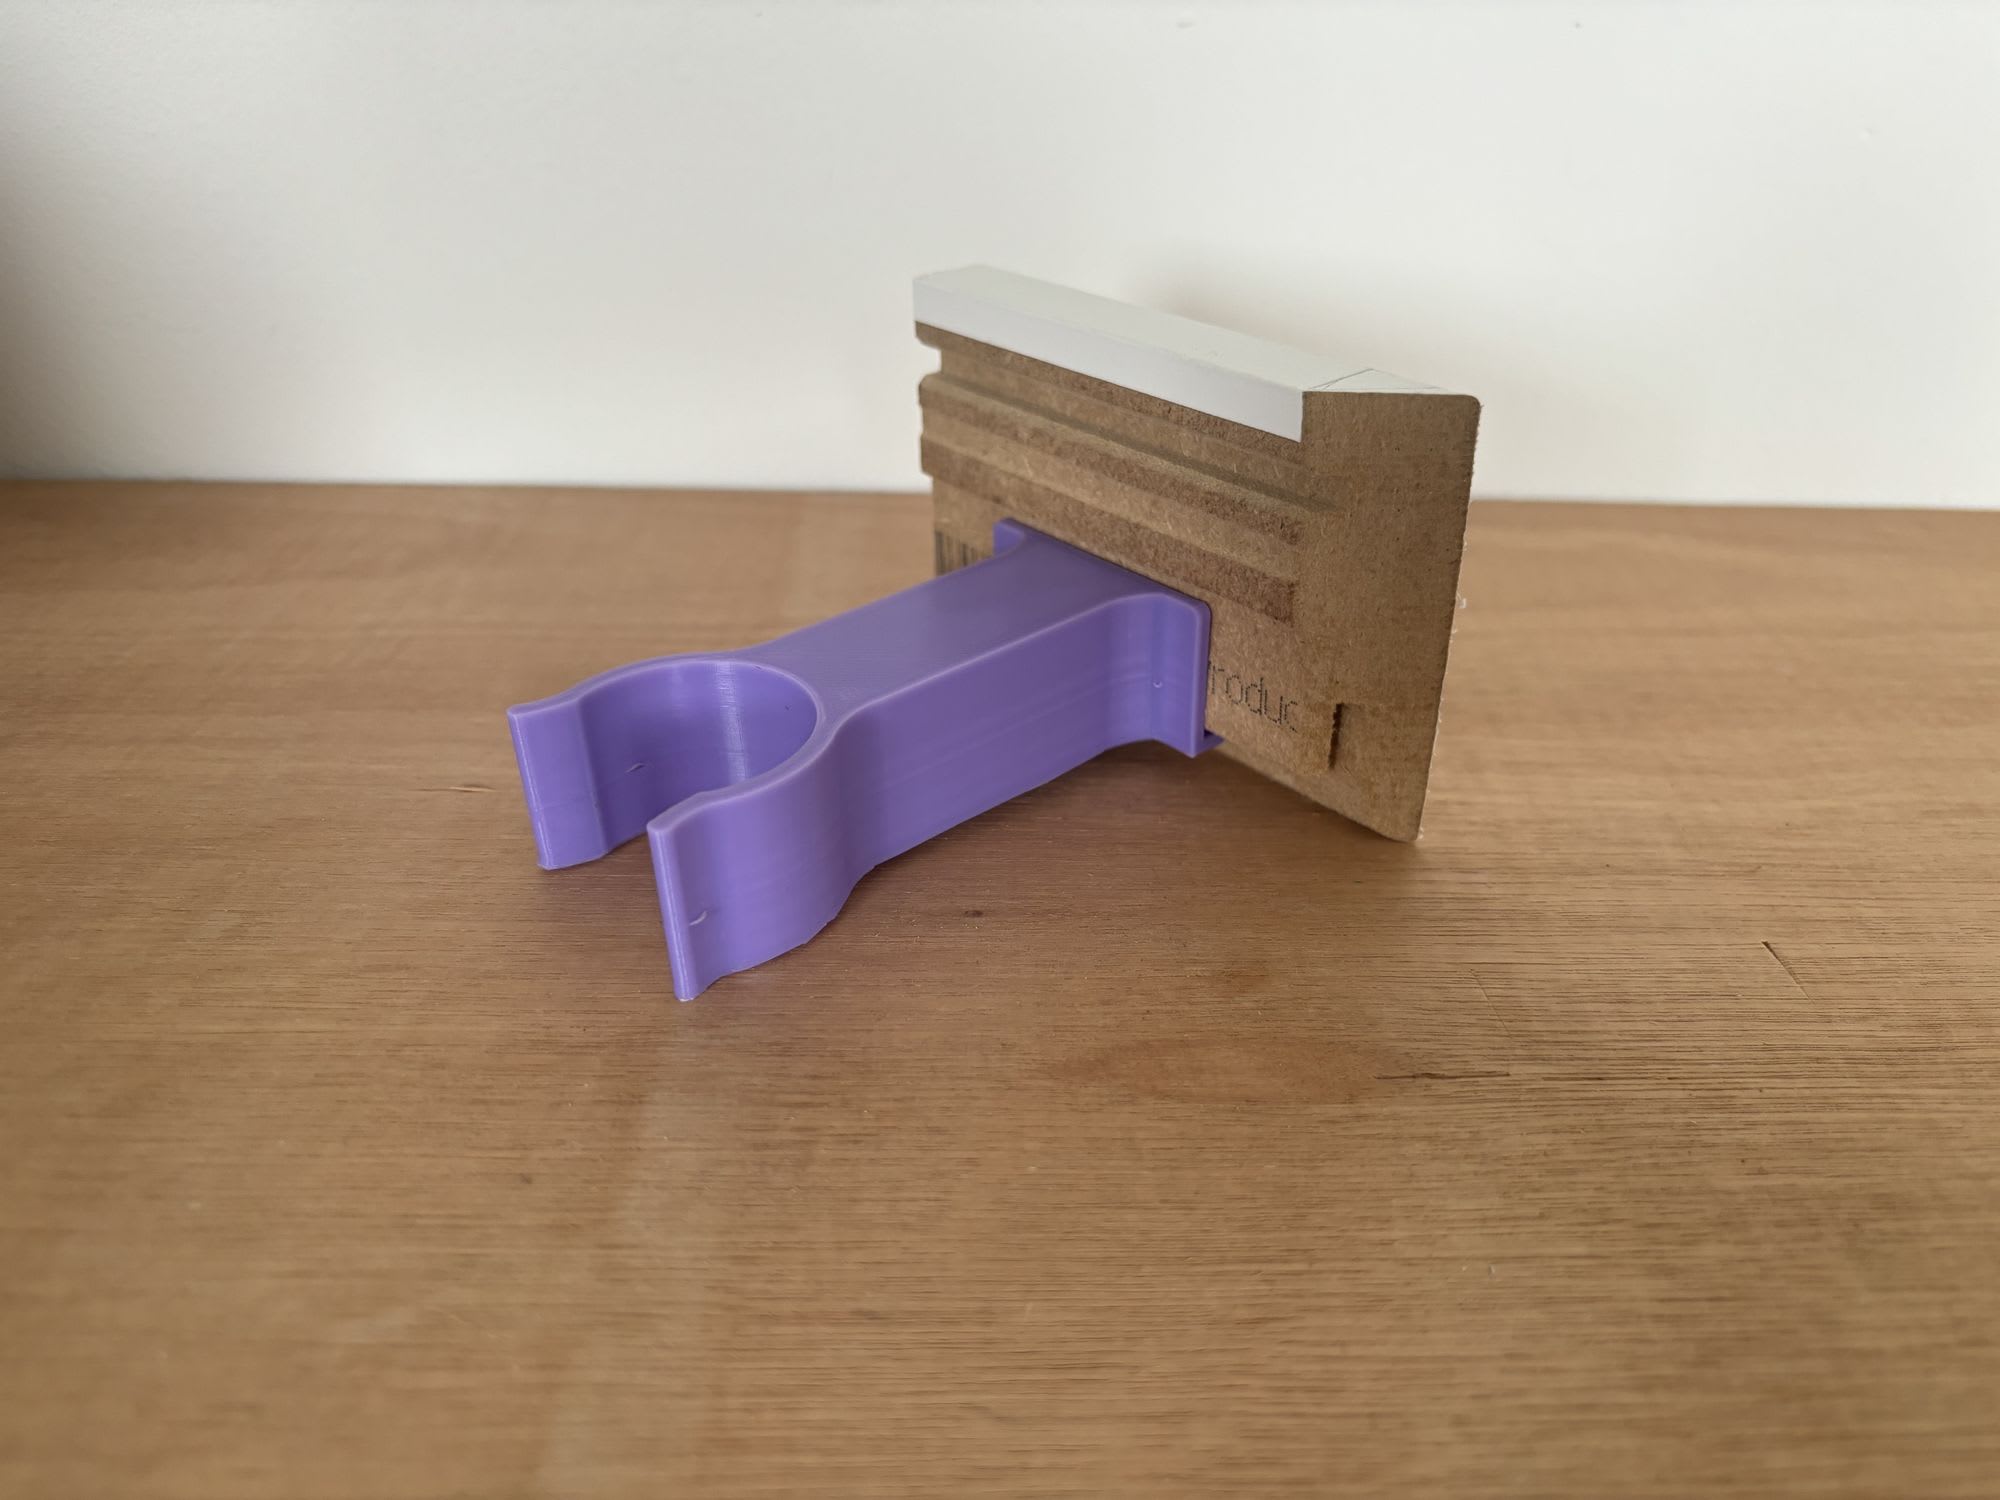
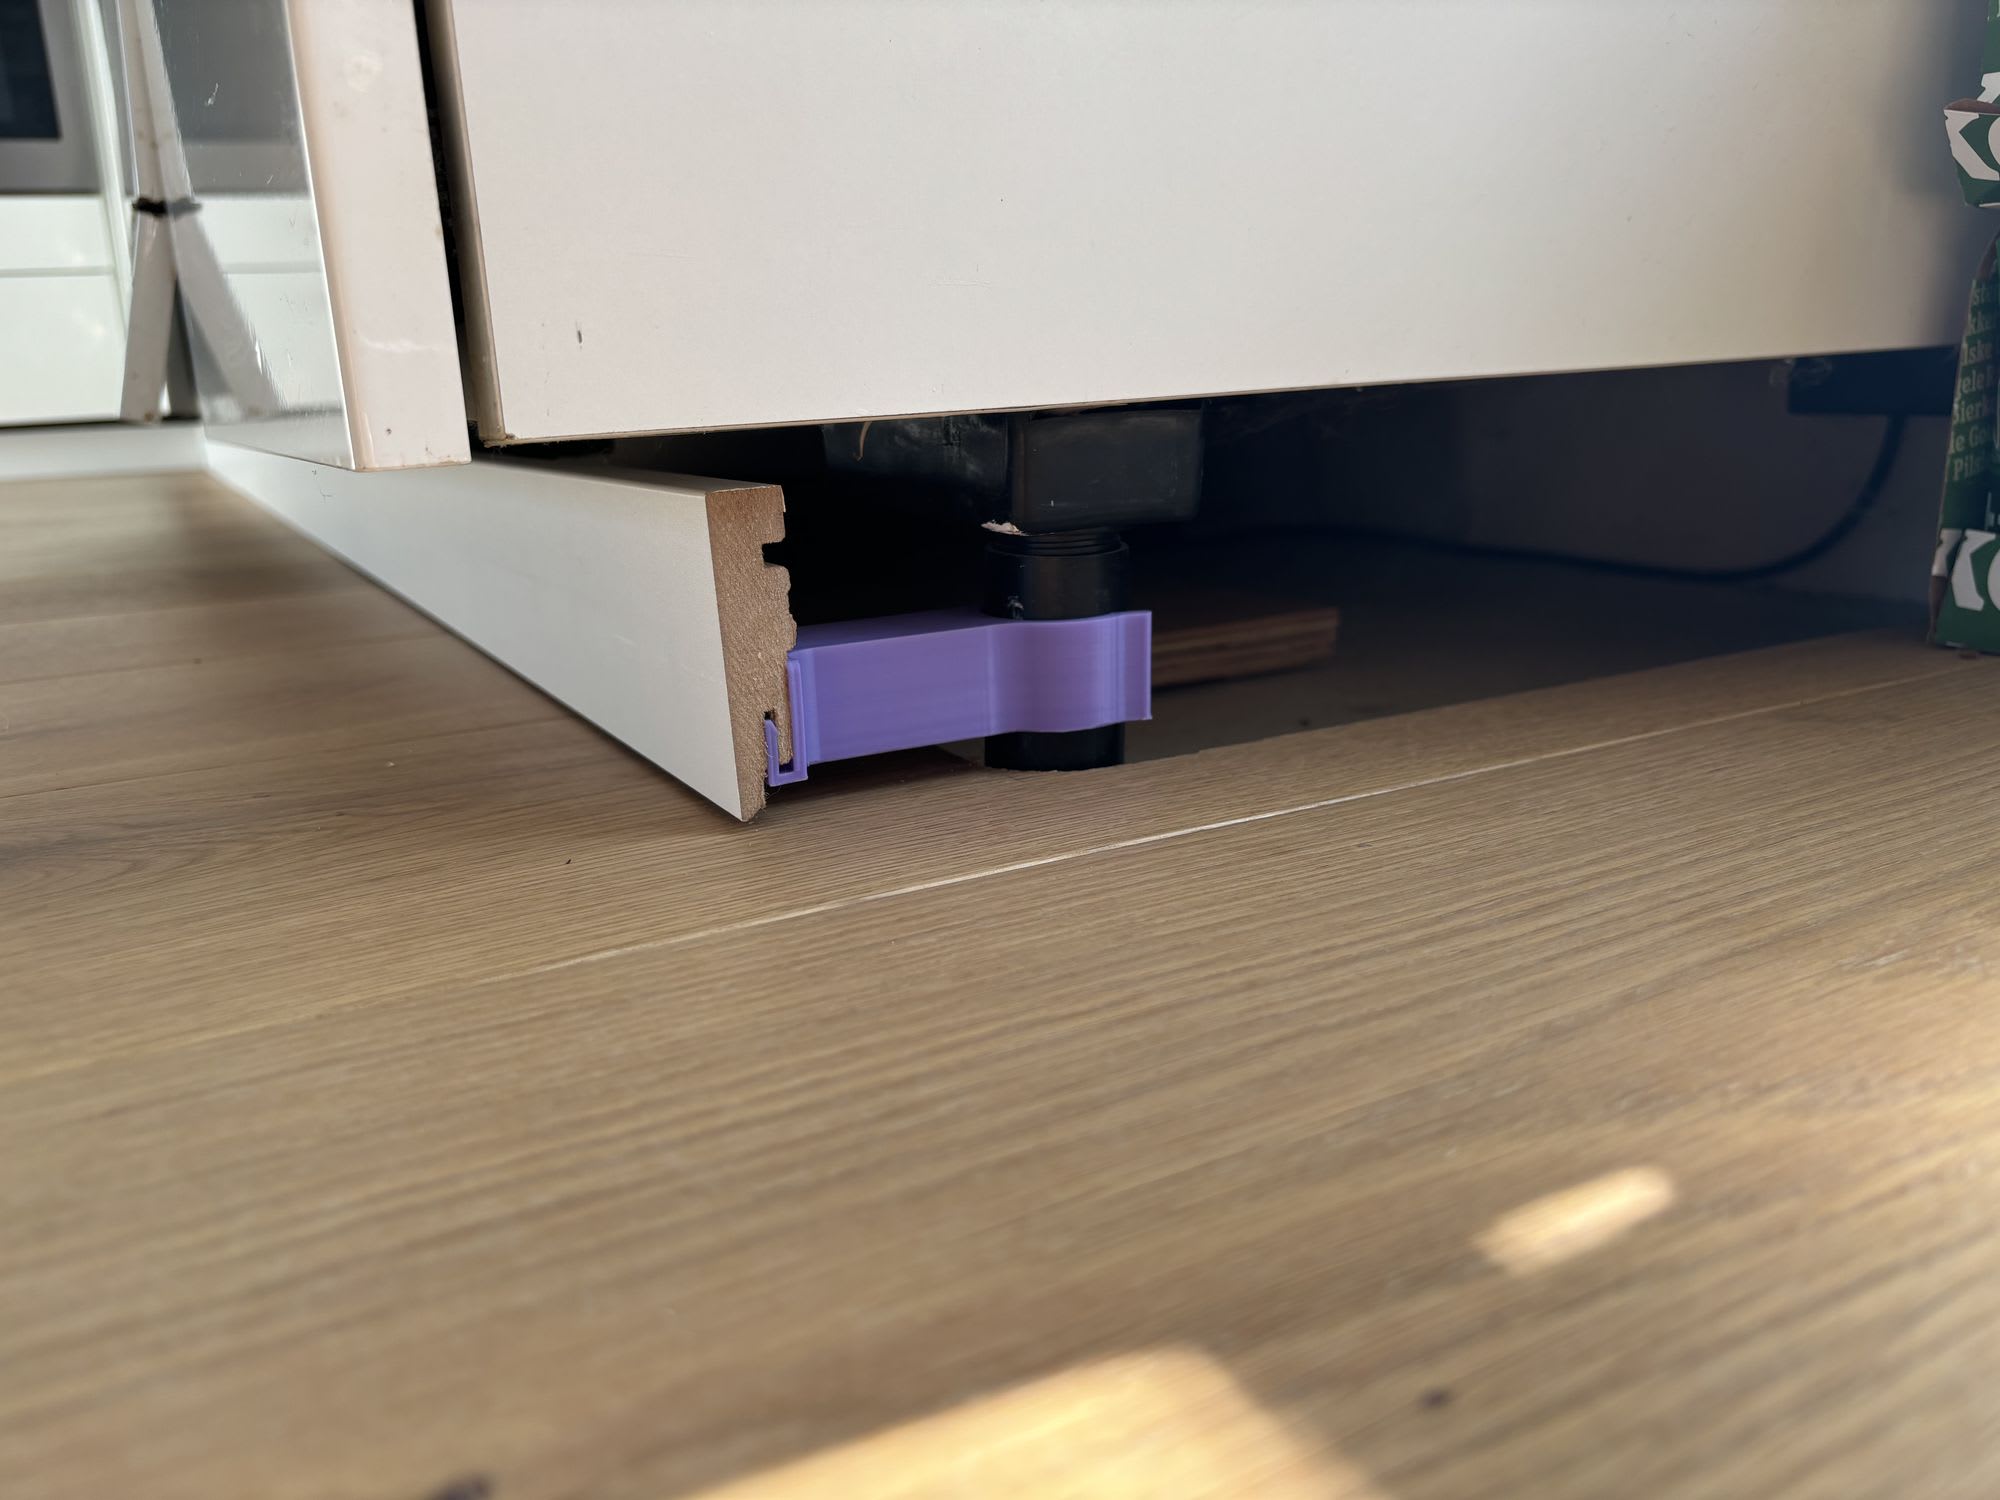
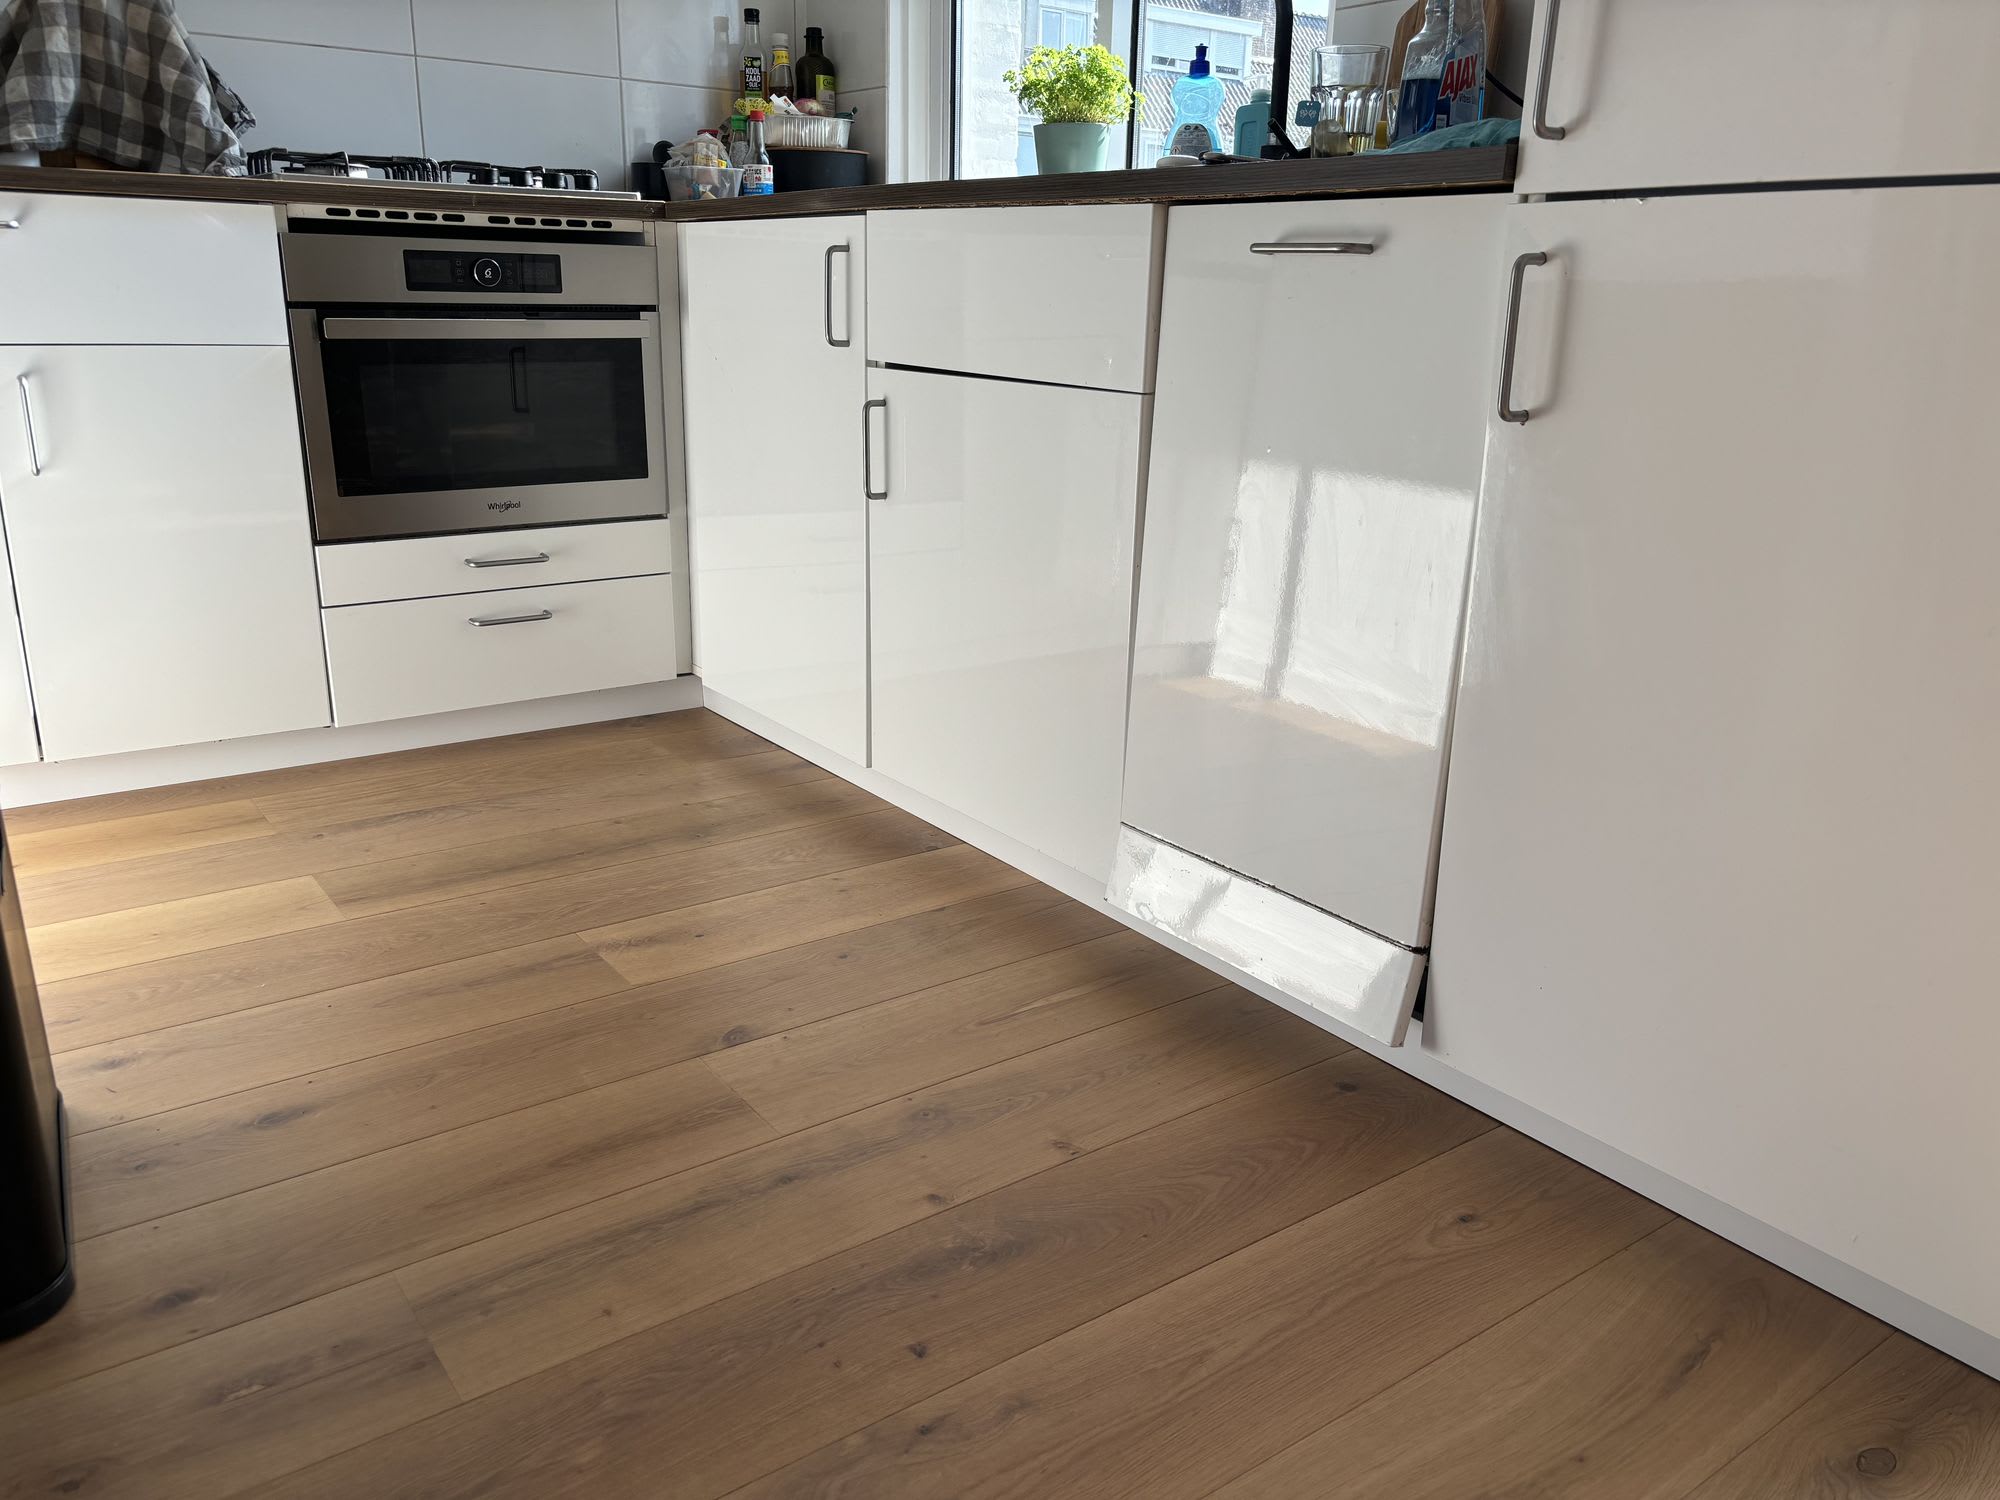
I had 3 planks of baseboard left over, after finishing all the rooms. I wanted to use these to cover the bottom of my kitchen cabinets, as they were just standing on legs, leaving an open gap where food and other items can get lost, making cleaning a hassle. Additionally, it did not look aesthetically pleasing.
Unfortunately I could not use the clips here, as there is nothing I could screw them into. So I grabbed my caliper again and measured the diameter of the legs of the kitchen cabinets. I then designed a super simple friction clamp and added to the backside of the clip. I went through a few design iterations this time as I found more spacing was needed. The final version extrudes roughly 5.5cm from the leg attachment to the back of the baseboard, which gave enough space for my dishwasher this is sticking out further than the rest of the cabinets. I also ended up tuning the spacing a little bit on the clip that hold the baseboard, to have slightly less tension on the plastic and slightly less friction on the fit.
This worked brilliantly, and was even easier to install than the wall clips. Everything is click-snap friction fit and works really well!
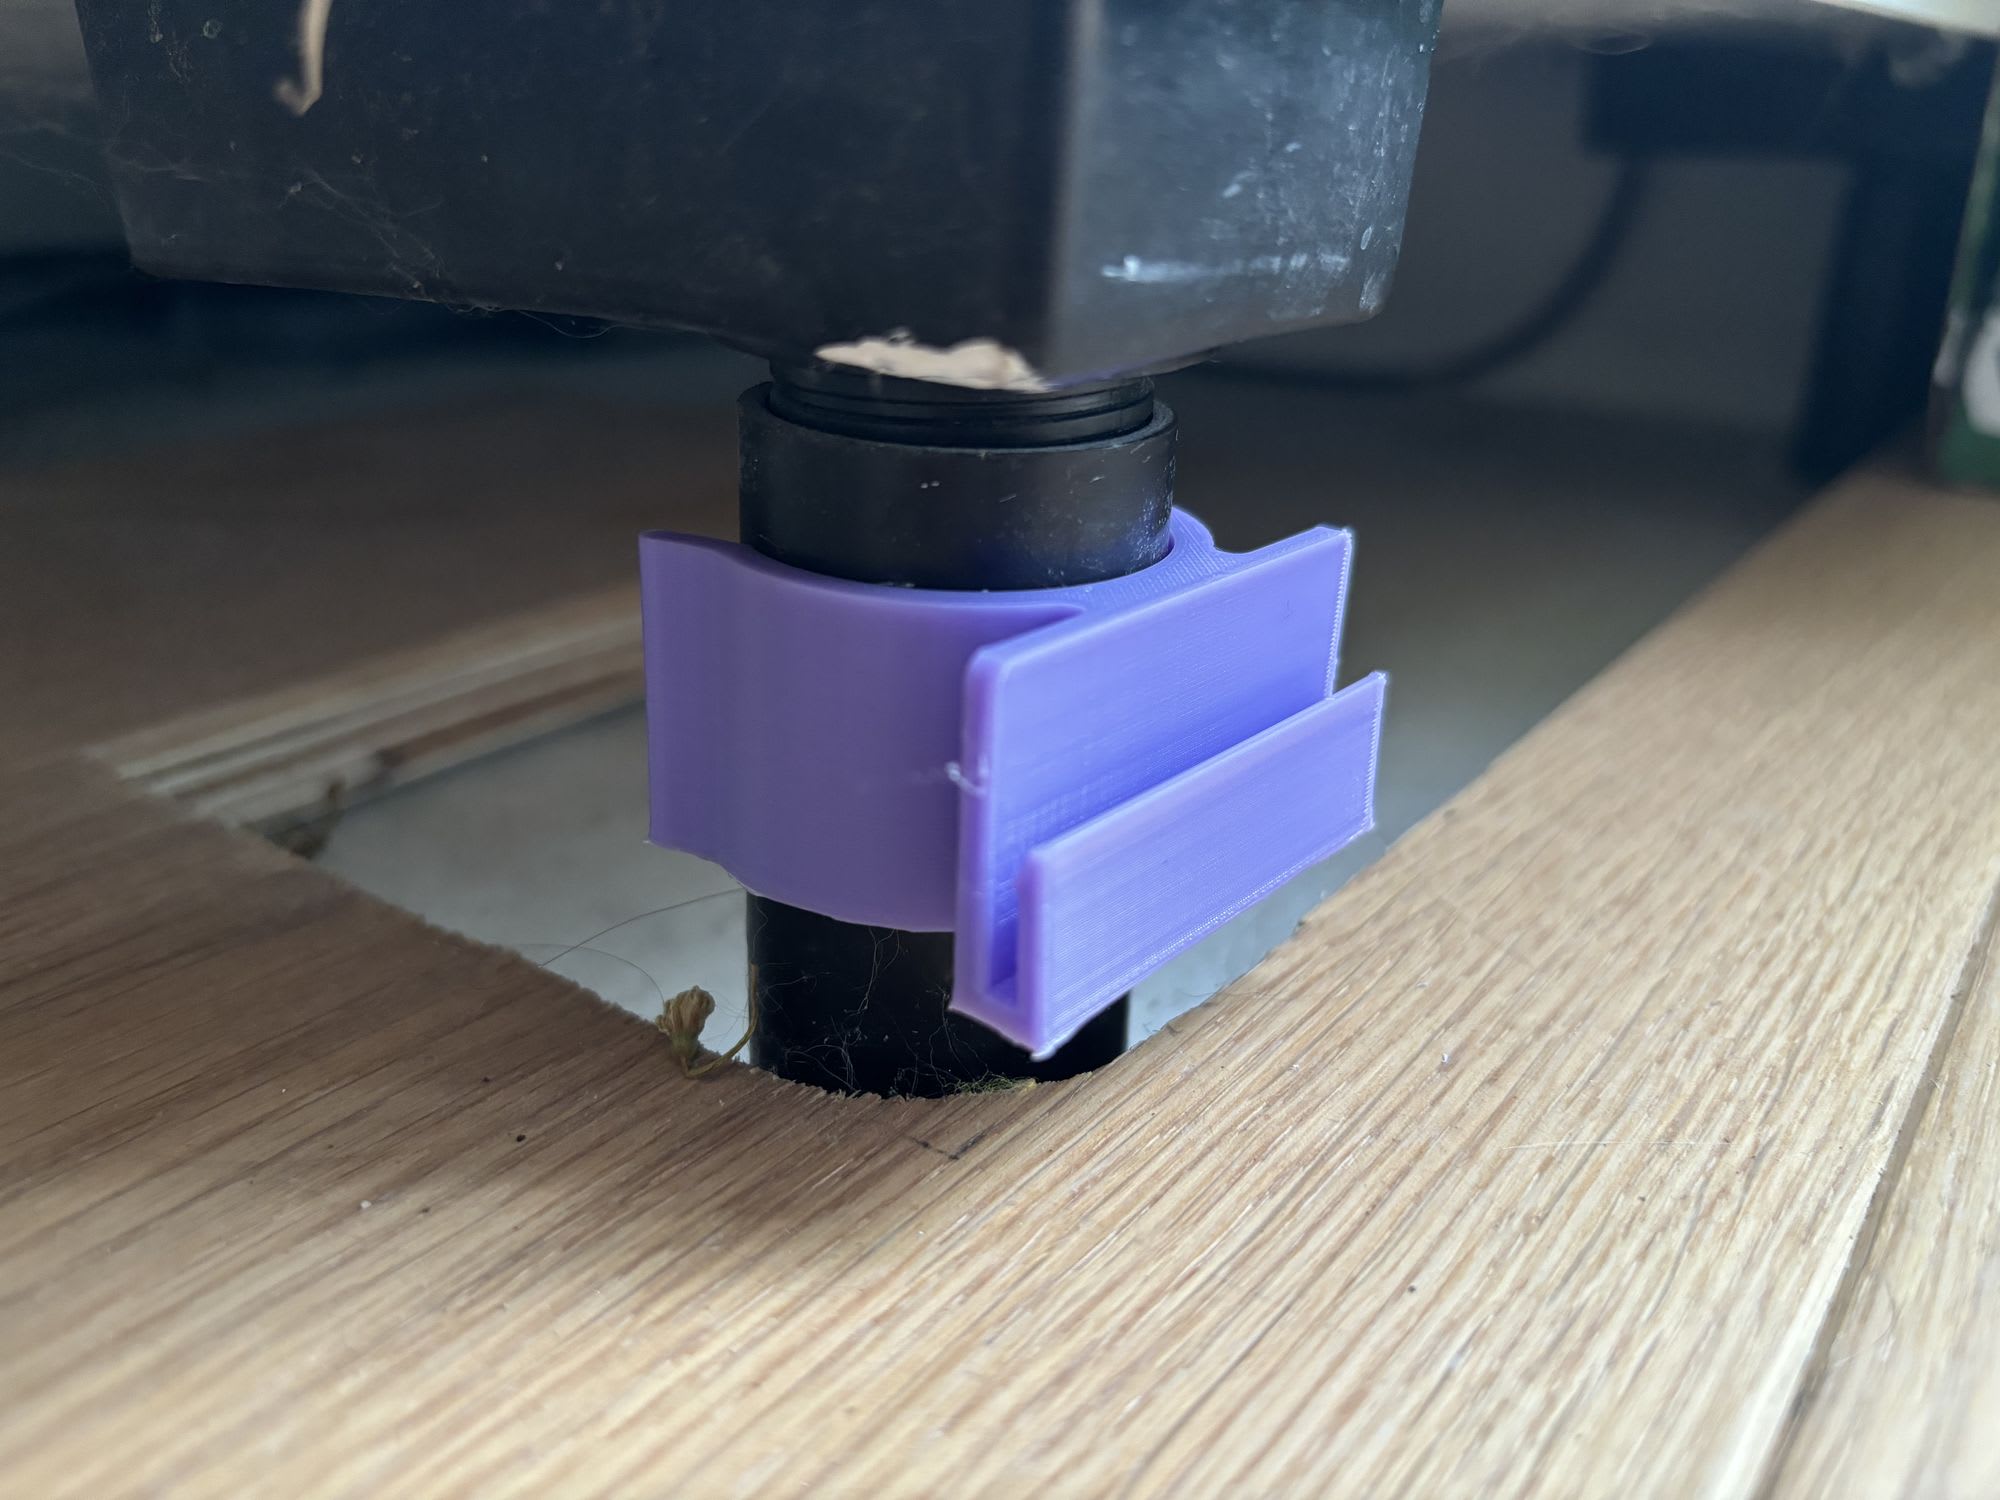

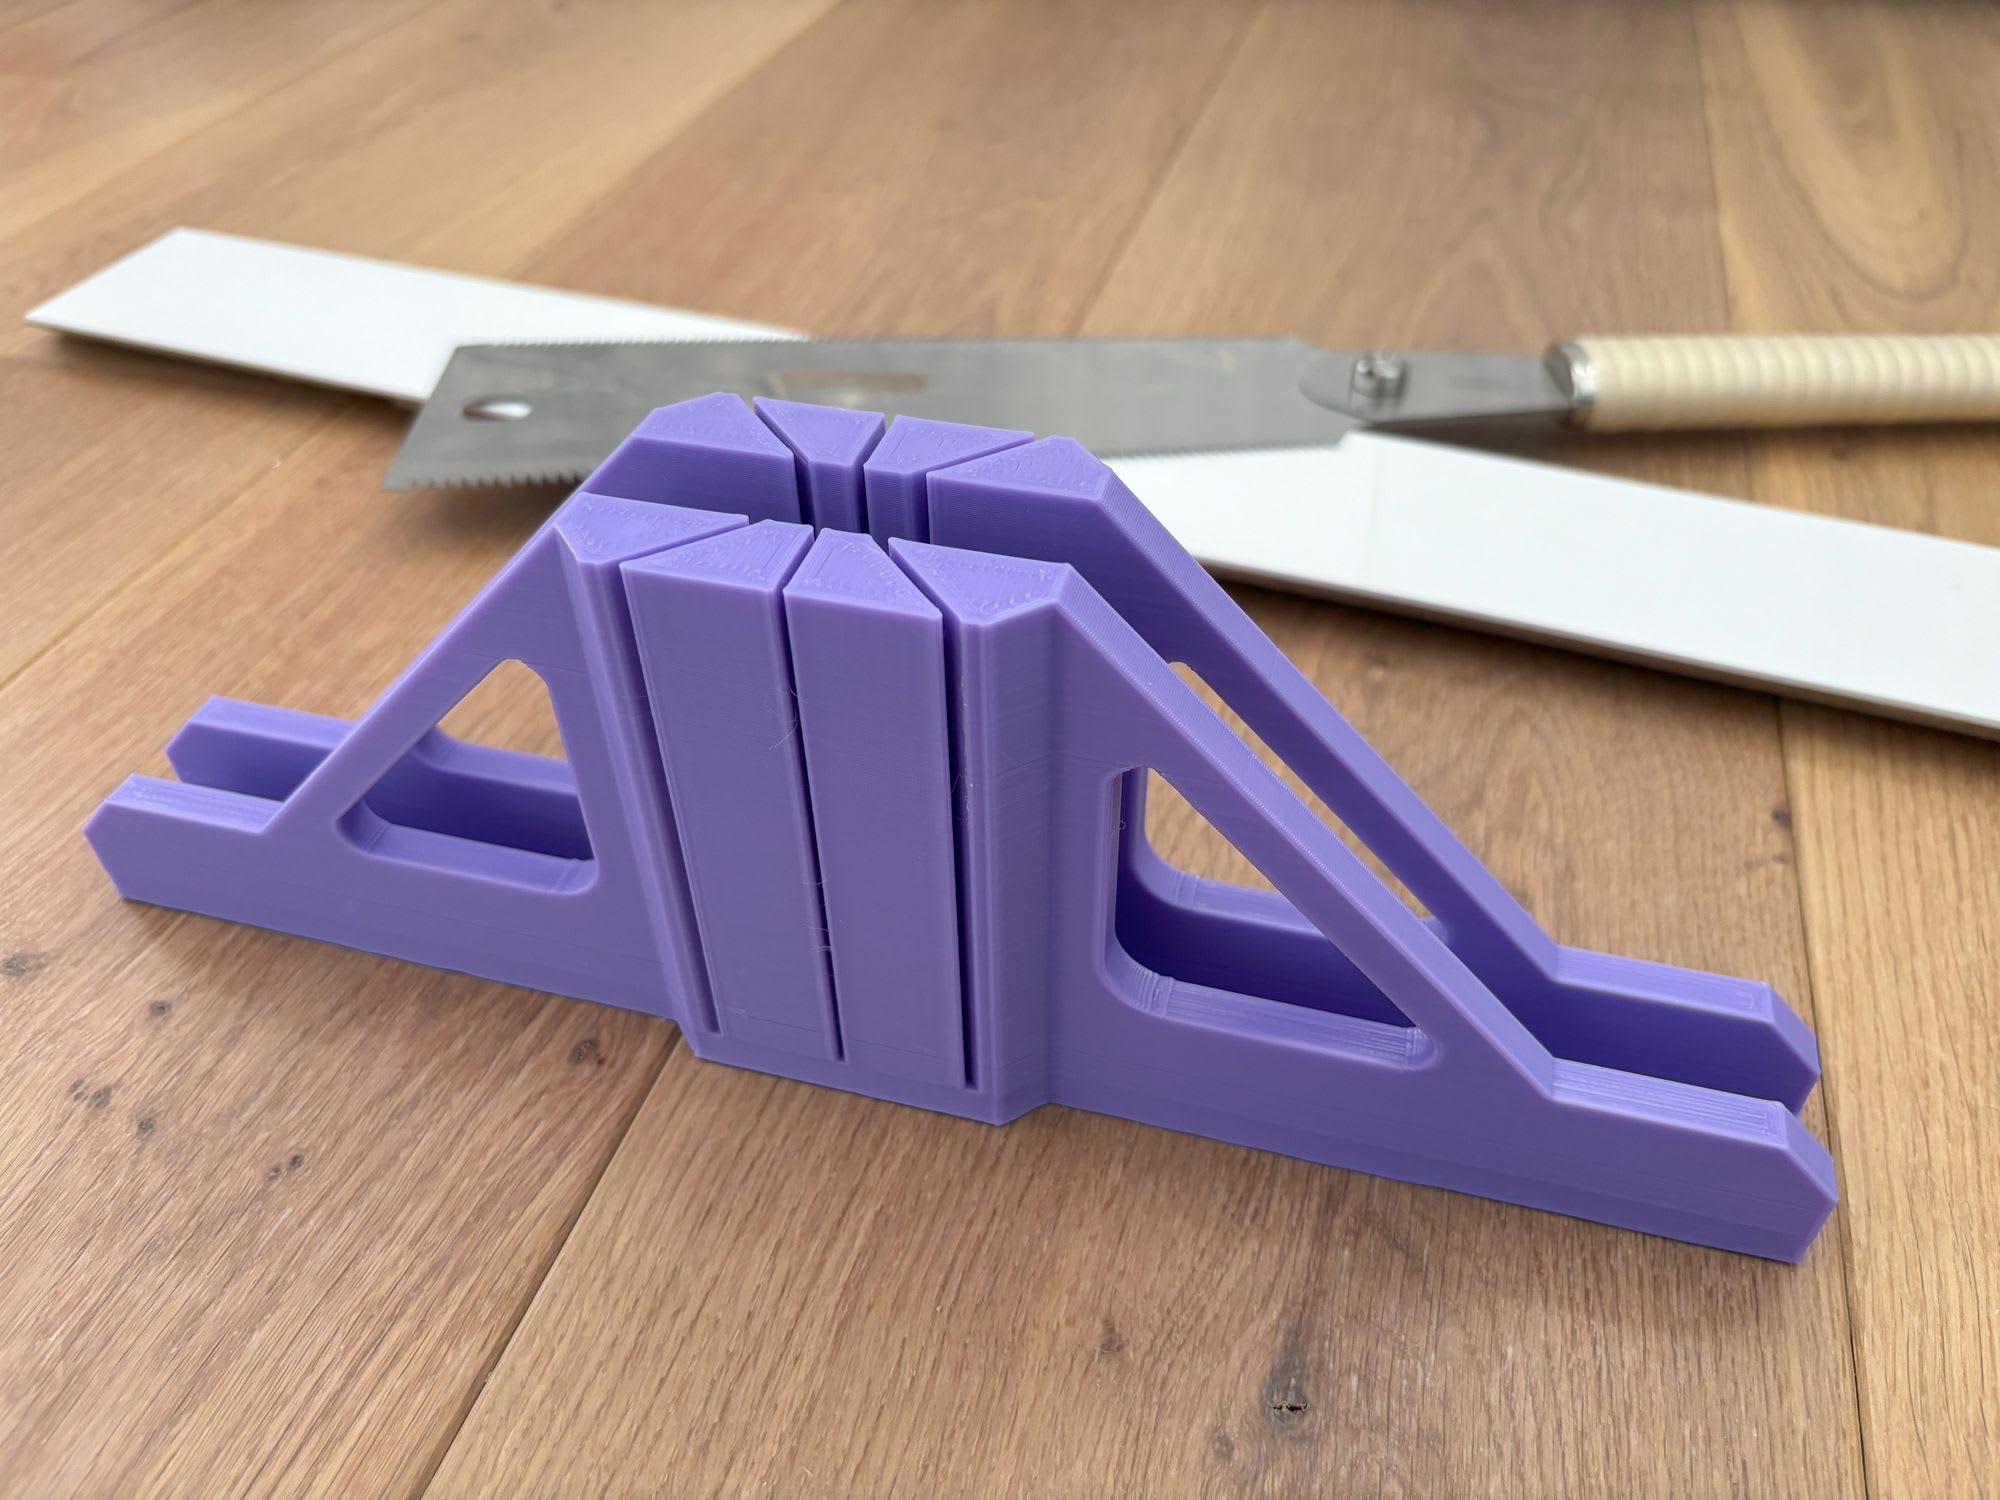
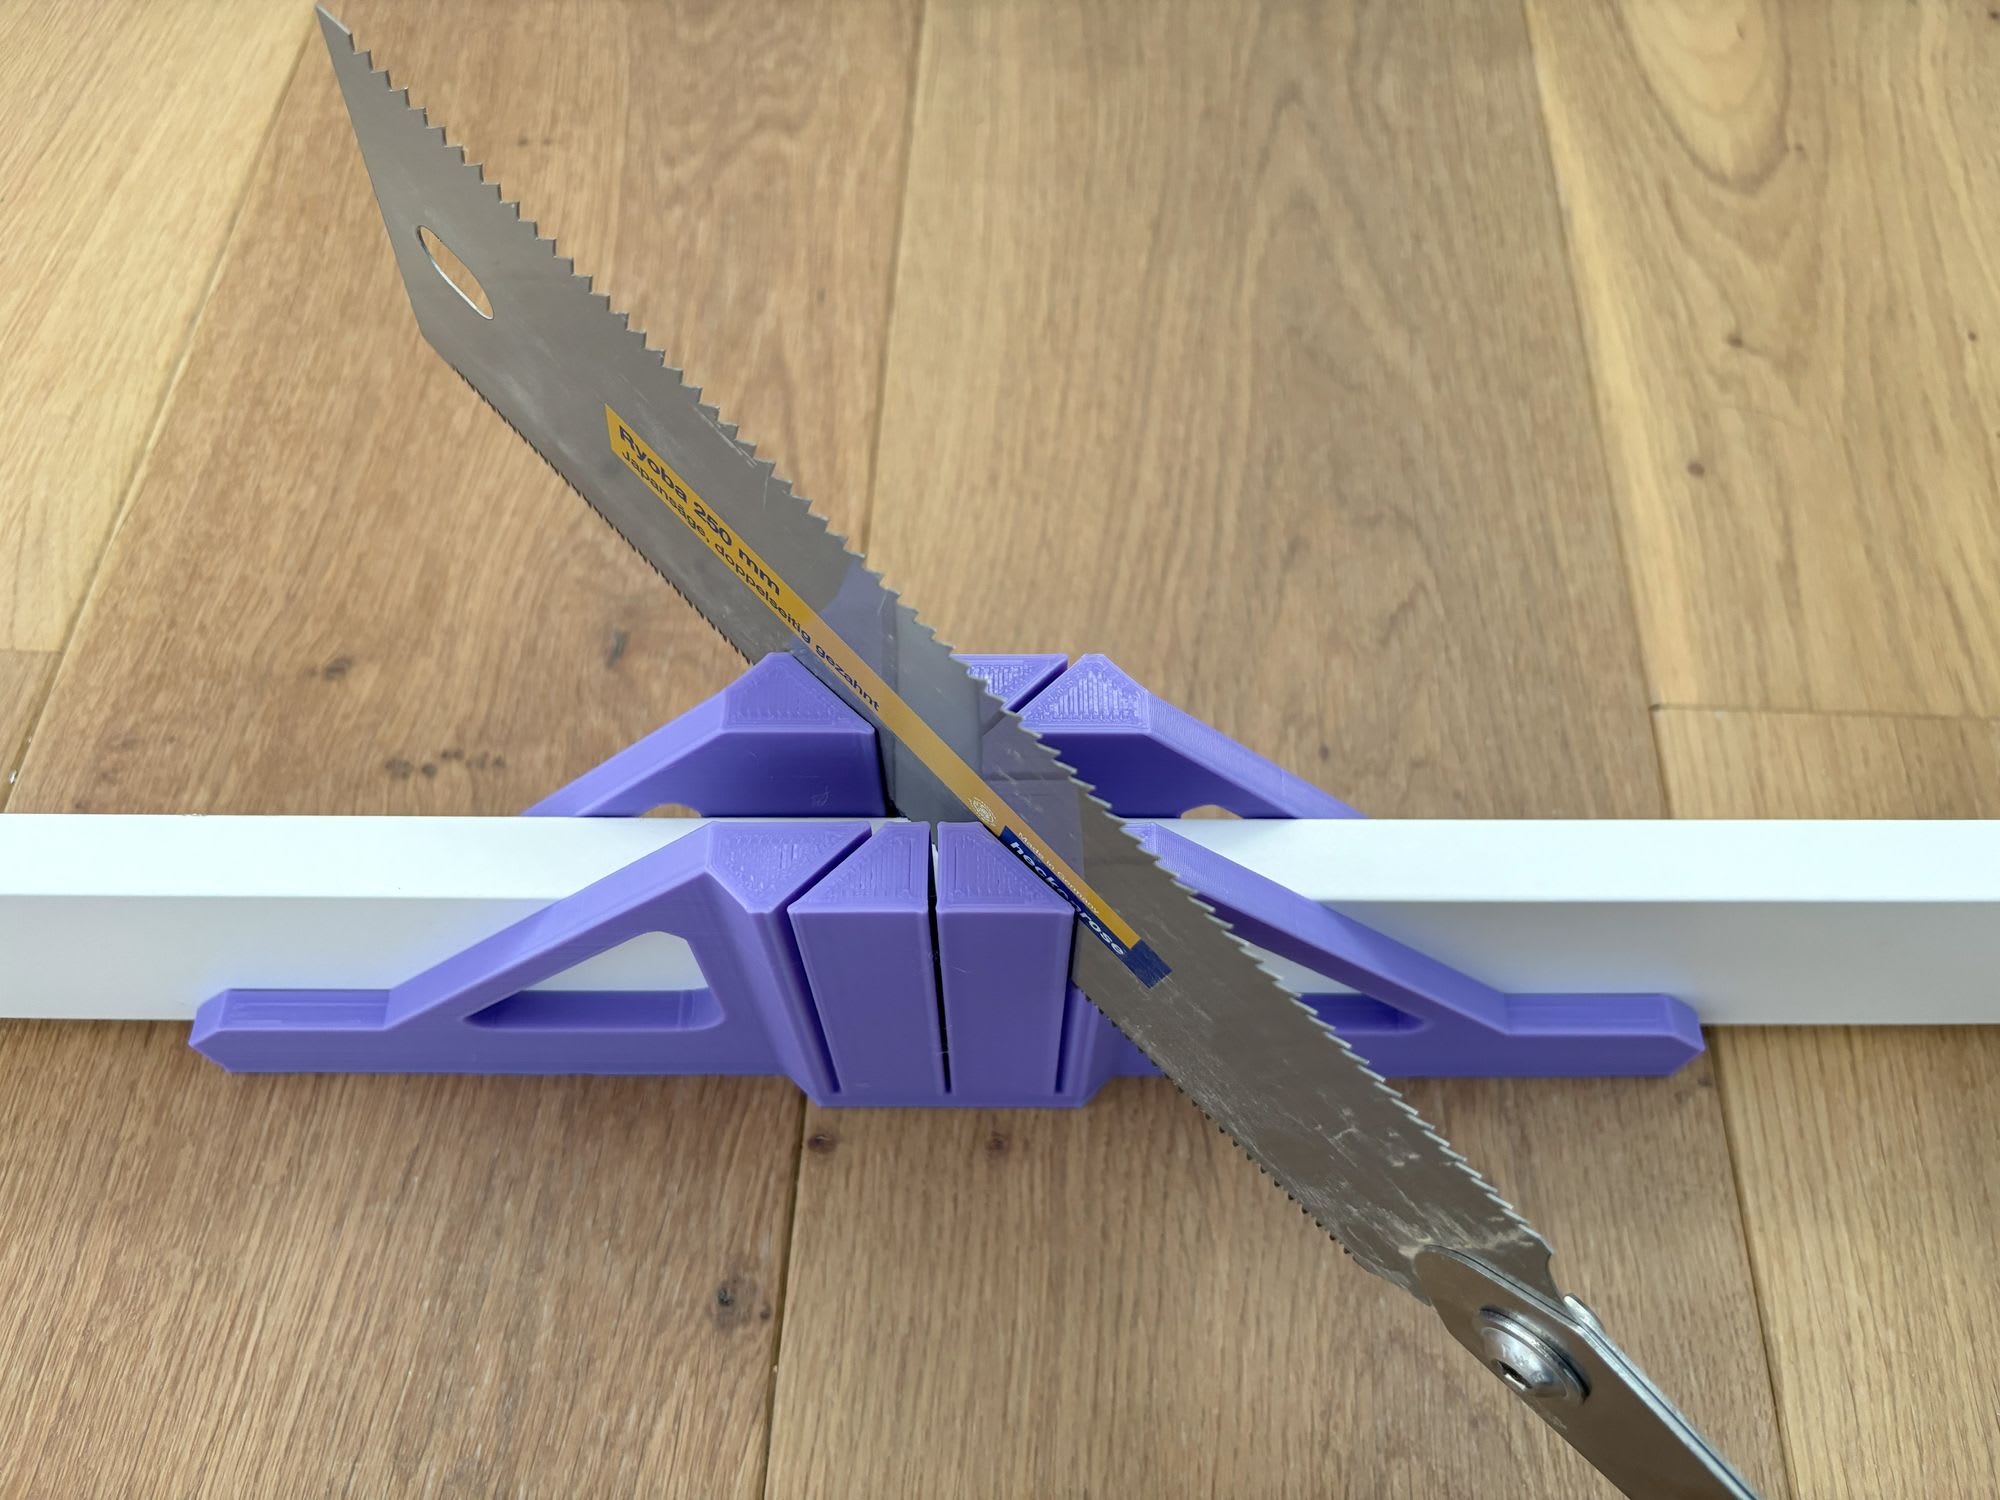
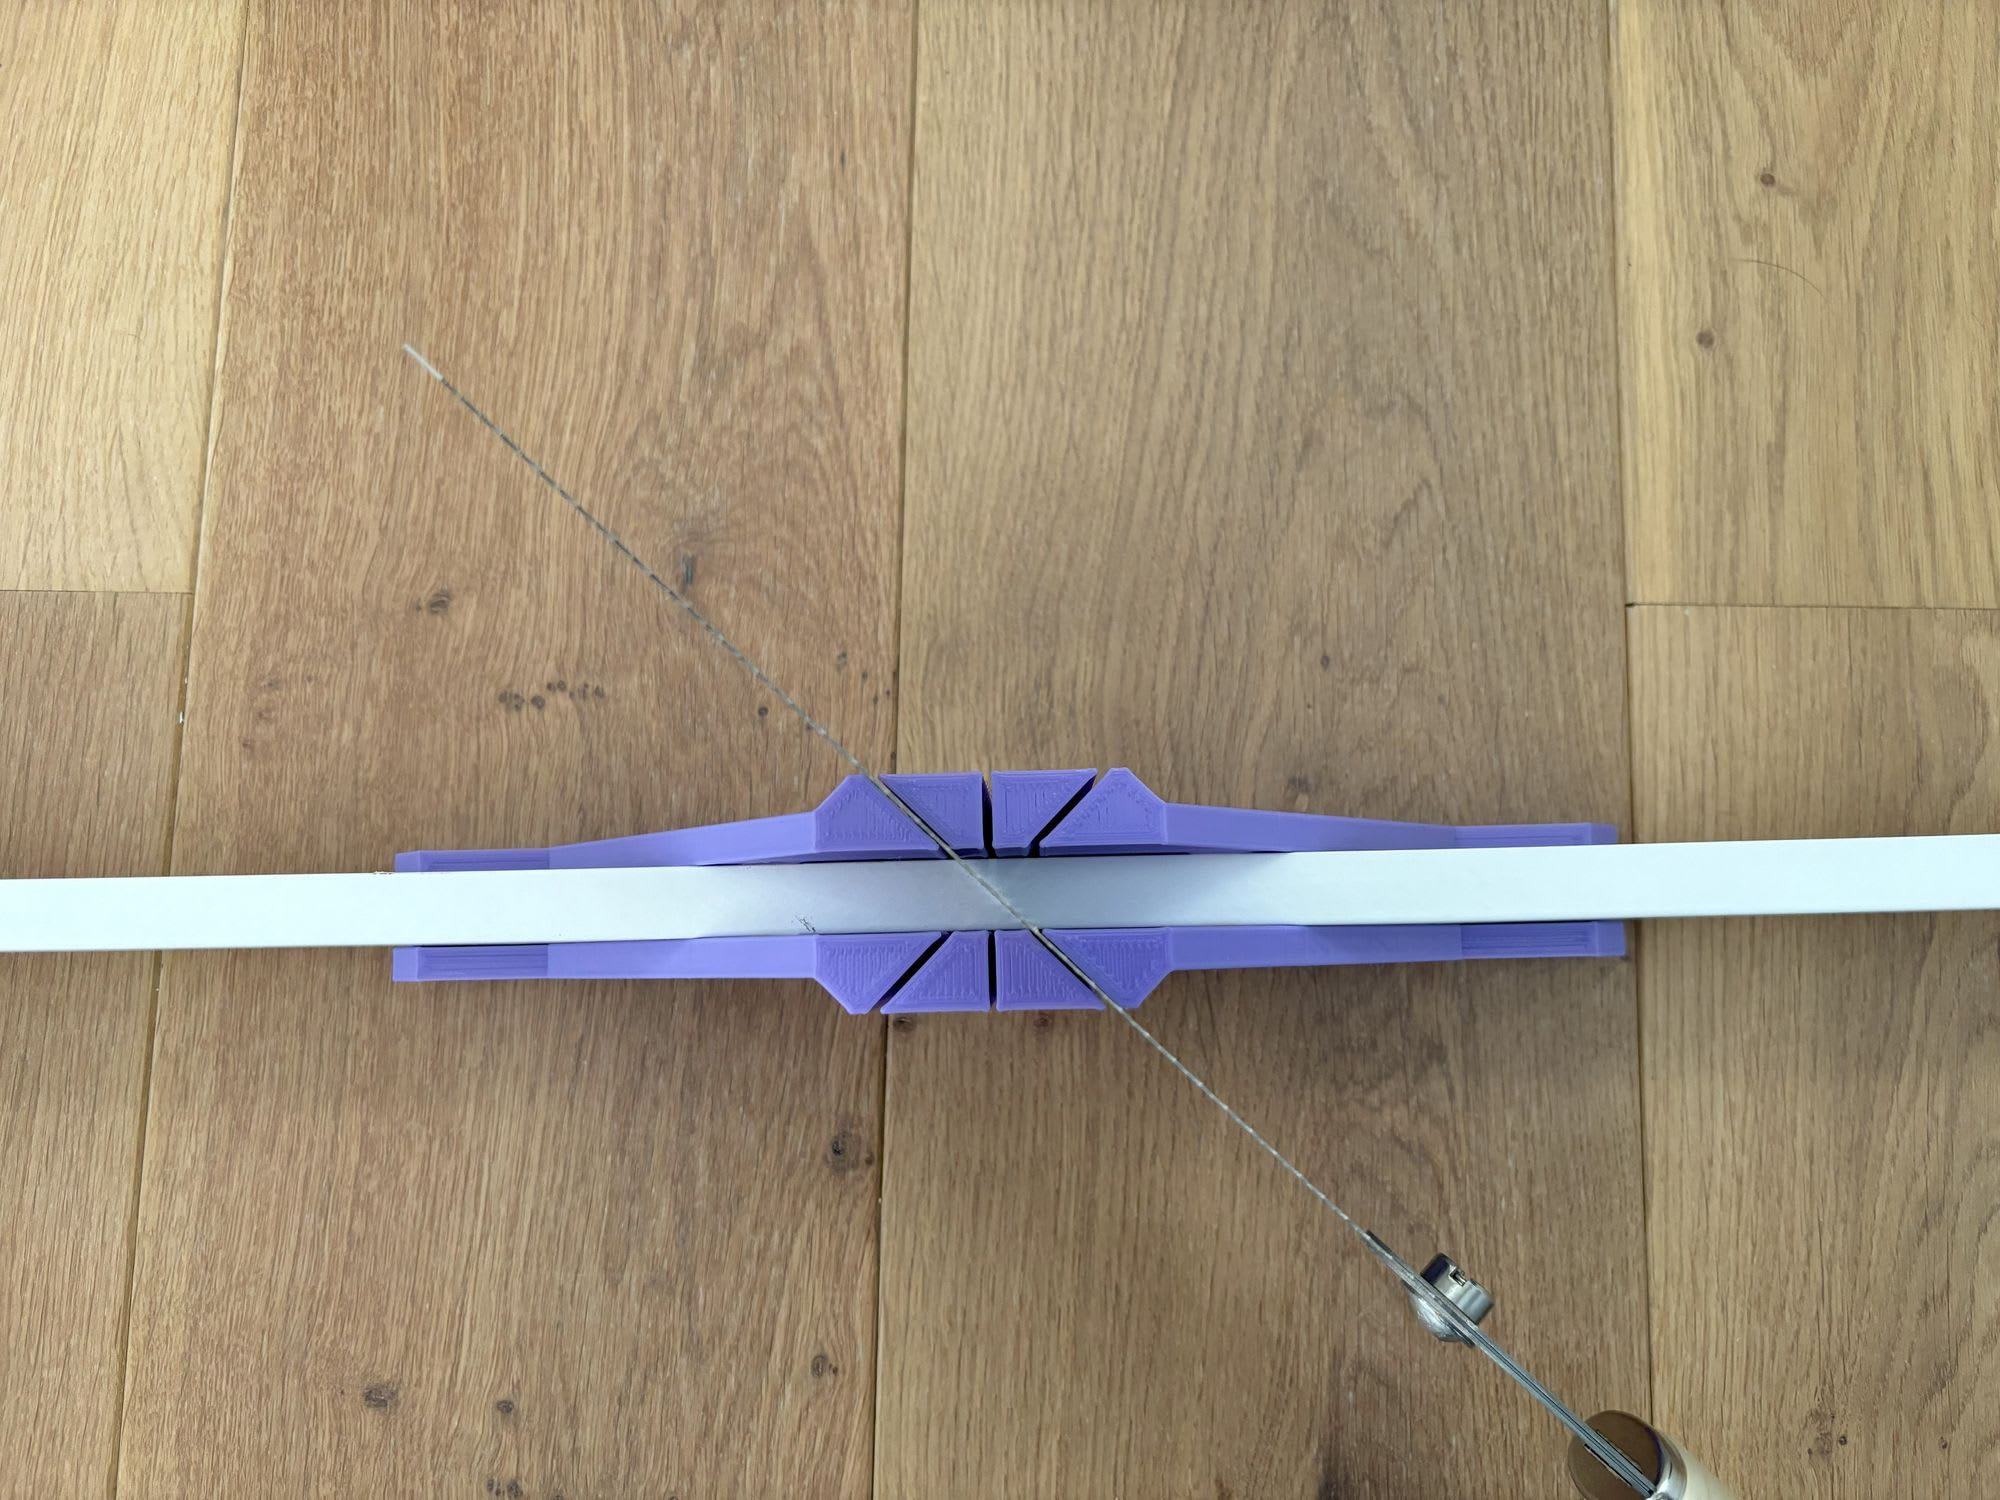
Custom saw box for 15mm baseboard
I bought a universal sawbox from the hardware store to help guiding my japanese handsaw. This worked horribly, as the box was about the same height as the baseboard, making it really difficult to start the cut (at least for an amateur wood worker like me). So I decided to design a saw box dedicated to these baseboards. The gap is a tiny bit wider than 15mm, and the height is 20 mm higher than the baseboard. This worked much better, especially for the 45 degrees cuts for the miter joints.
Original parts
Baseboard I used: https://www.hornbach.nl/p/maclean-clipplint-classic-robuust-65-mm/8275002/
To find more compatible variants, search for the following EAN product numbers: 8711449076953, 8711449070753, 8711449065643, 8711449076953, 8711449065650, 8711449065629, 8711449065636, 8711449065605
Clip: https://www.hornbach.nl/p/maclean-plintclips-zakje-25-stuks-incl-boormal/8274805/?sourceArt=8275002&trackArticleCrossType=we&url=8274805
(EAN: 8711449065568, 8711449065544)