
How to Add MeiliSearch to Your Medusa 2.0 Project
Enhance your Medusa 2.0 project with powerful search functionality using MeiliSearch. This guide walks you through setting up a MeiliSearch instance, configuring the backend with a community plugin, and integrating it into your storefront for seamless product search.

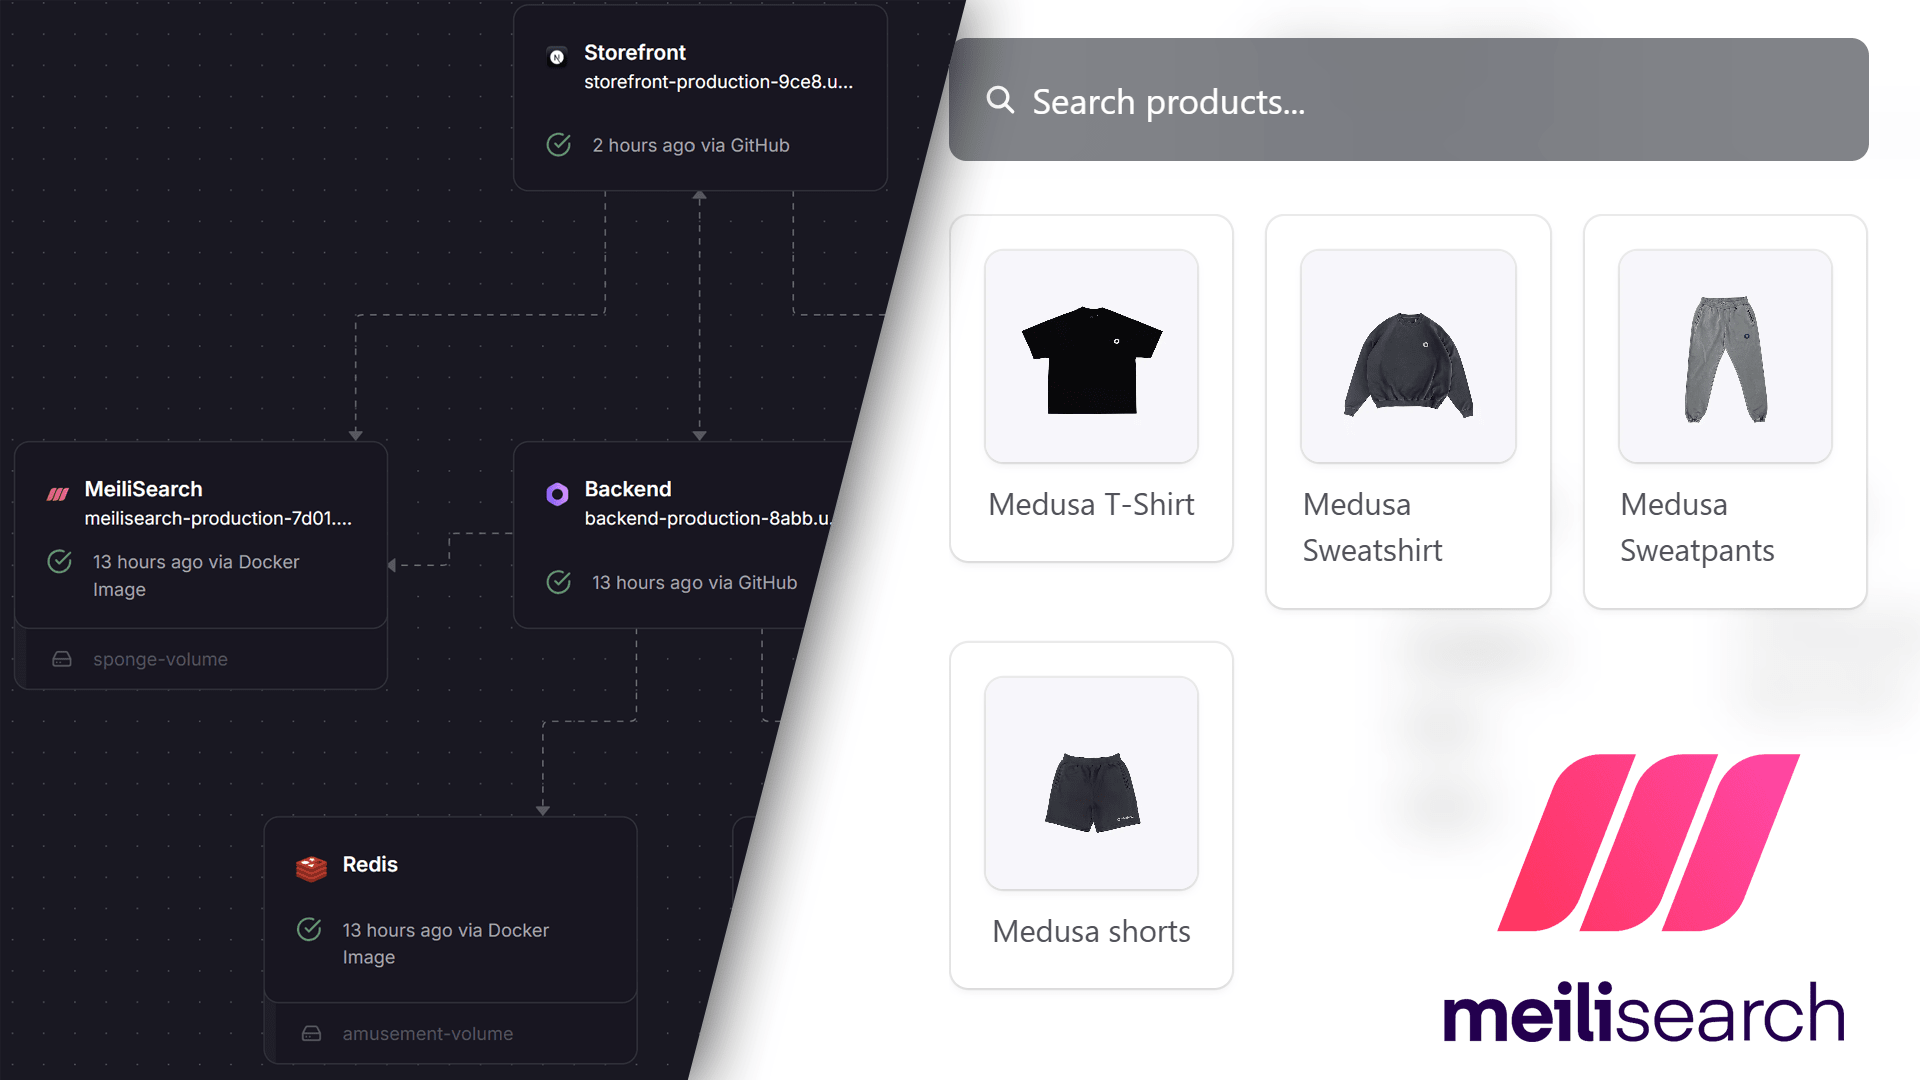
This guide assumes you already have a working Medusa 2.0 project with both a backend and storefront set up. We'll walk you through implementing MeiliSearch step by step. If you'd rather skip the manual setup, you can use my Railway template for an effortless deployment where everything is preconfigured:
 (OBS: requires hobby plan 5$/m)
Railway caps free users to 5 services. The template above has 7. I also have a TRIAL version that does not include MeiliSearch.
Video Instructions
If you're ready to dive into the implementation yourself, or if you just want to understand how it is implemented in the template above, this guide will cover it all, in three simple steps:
- Run a MeiliSearch instance
- Implement MeiliSearch in the Medusa backend
- Configure MeiliSearch in the storefront
1. Run a MeiliSearch Instance
MeiliSearch is a powerful, open-source search engine that runs as a separate service, not just an npm dependency. Below are three methods to run it: Railway, Docker, or MeiliSearch Cloud. We'll cover the first two in detail.
Method 1: Railway
- Go to your project canvas on Railway and create a new service.
- Choose the Docker Image option and search for
getmeili/meilisearch:latest.

- Once deployed:
- Rename the service to
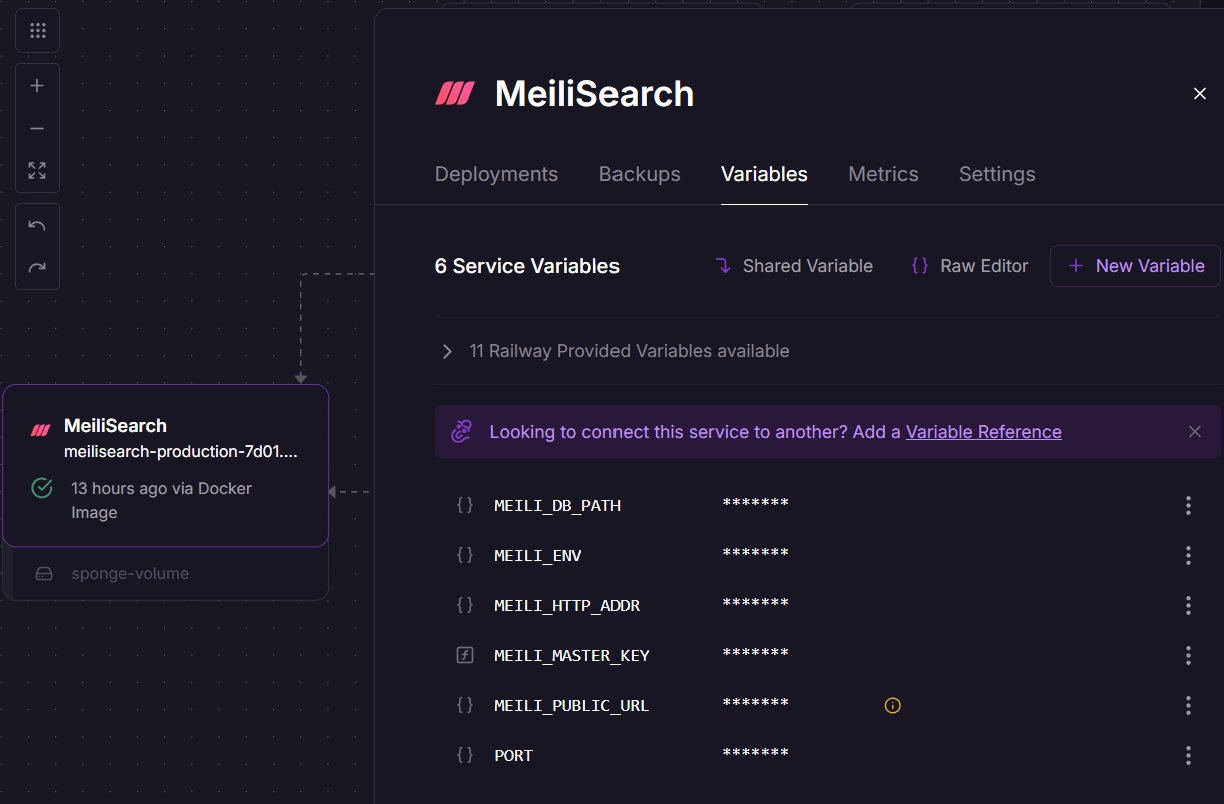
MeiliSearch. - Navigate to the Variables tab and add the following environment variables:
- Rename the service to
MEILI_DB_PATH="/meili_data/data.ms"
MEILI_ENV="production"
MEILI_HTTP_ADDR=":::3331"
MEILI_MASTER_KEY="some-long-random-string"
MEILI_PUBLIC_URL="${{RAILWAY_PUBLIC_DOMAIN}}"
MEILI_MAX_INDEXING_MEMORY="2GiB"
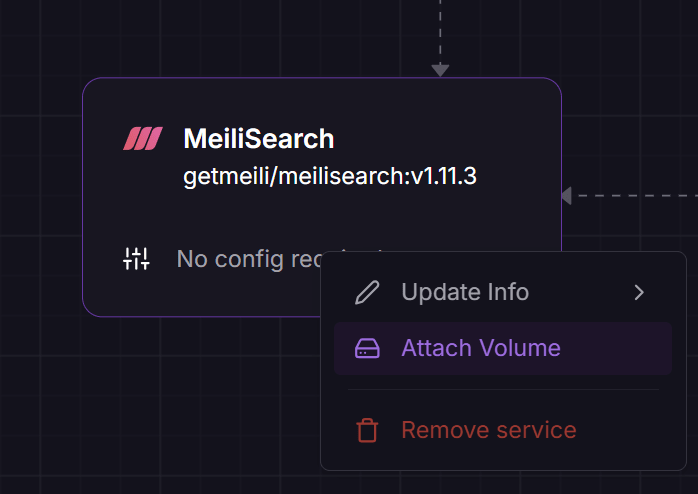
PORT="3331"- Attach storage volume, right click on the MeiliSearch container and choose Attach Volume from the menu
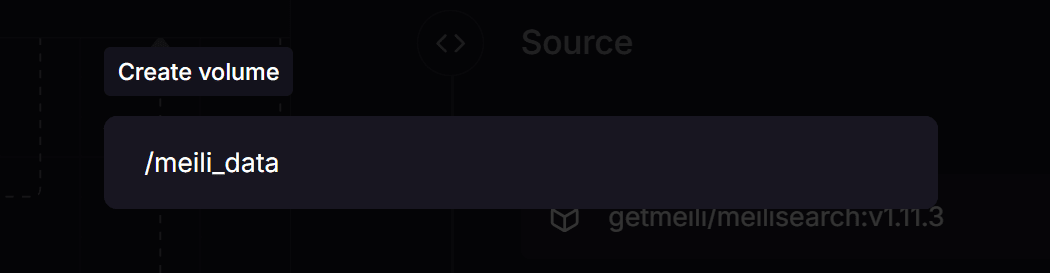
- Set mount path to
/meili_data
- Enable networking, go to Settings -> Networking and turn on HTTP
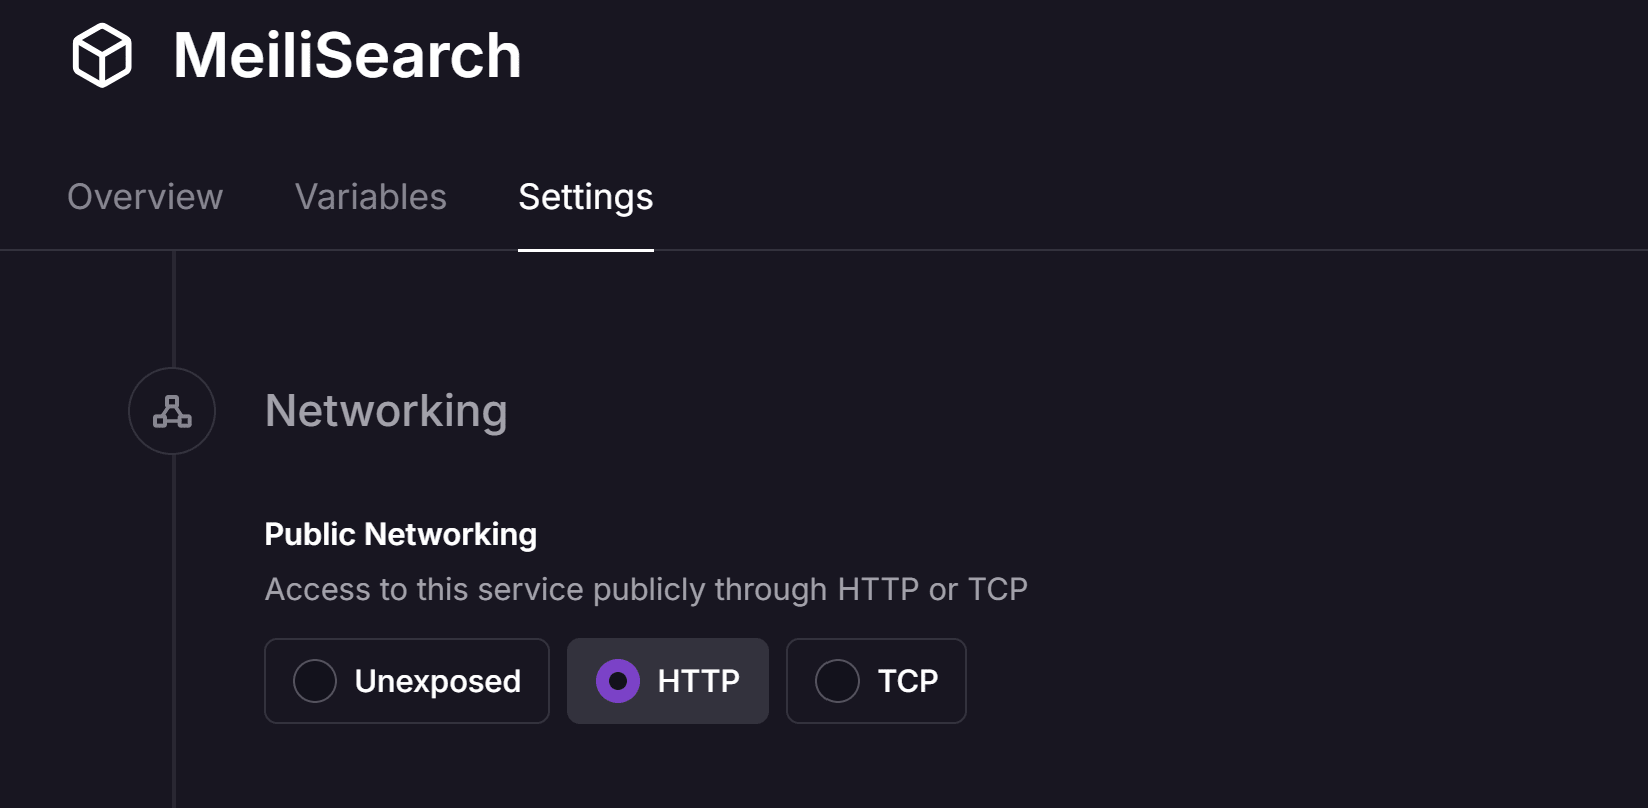
That's it! Your MeiliSearch instance is now ready. You can skip the Docker section now that you've used Railway instead. Use image below for reference your finished result.
Method 2: Docker (Local or VPS)
Use the following Docker Compose configuration to set up MeiliSearch locally or on a VPS:
docker-compose.yml
services:
  meilisearch:
    image: getmeili/meilisearch:v1.49.0
    ports:
      - "7700:7700"
    volumes:
      - meilisearch-data:/meili_data
    environment:
      MEILI_MASTER_KEY: your_master_key_here
    healthcheck:
      test: ["CMD-SHELL", "curl -fs http://localhost:7700/health || exit 1"]
      interval: 30s
      timeout: 5s
      retries: 5

volumes:
  meilisearch-data:
If you are not familiar with Docker compose, you may refer to the quick start guide. Additionally, more information about local instance of MeiliSearch can be found here.
Method 3: MeiliSearch Cloud
If you prefer a managed solution or want to support the developers, consider using MeiliSearch Cloud. It provides seamless deployment and additional features like facet search, semantic search, and geosearch.

2. Backend Implementation
Since the Medusa core team hasn’t released an official MeiliSearch module for version 2.0 yet, we’ll use the community-created @rokmohar/medusa-plugin-meilisearch. Make sure to ⭐ their repository!
Version compatibility matters here, check the table in the plugin's README. In short:
- Plugin ^1.4.1 requires Medusa ^2.15.2 (and Node >= 22)
- Plugin ^1.3.7 works with Medusa ^2.13.4- Older Medusa versions need plugin 1.0.x
Step 1: Install the Plugin
Run one of these commands in your Medusa backend directory:
npm install --save @rokmohar/medusa-plugin-meilisearch
# or
yarn add @rokmohar/medusa-plugin-meilisearch
Step 2: Configure Environment Variables
Add these variables to your backend's .env file:
MEILISEARCH_HOST=http://localhost:7700 # Or public cloud URL if you are using cloud an online MeiliSearch instance (Railway)
MEILISEARCH_API_KEY=your_master_key_here
And, if you are also hosting your project on Railway add the following two variables to your Medusa 2.0 backend Railway service:

MEILISEARCH_API_KEY="${{MeiliSearch.MEILI_MASTER_KEY}}"
MEILISEARCH_HOST="https://${{MeiliSearch.MEILI_PUBLIC_URL}}"
Step 3: Update Medusa Configuration
In your medusa-config.js, add the plugin configuration:
plugins: [
  // ... your other plugins,
  {
    resolve: '@rokmohar/medusa-plugin-meilisearch',
    options: {
      config: {
        host: process.env.MEILISEARCH_HOST,
        apiKey: process.env.MEILISEARCH_API_KEY
      },
      settings: {
        products: {
          type: 'products',
          enabled: true,
          fields: ['id', 'title', 'description', 'handle', 'variant_sku', 'thumbnail'],
          indexSettings: {
            searchableAttributes: ['title', 'description', 'variant_sku'],
            displayedAttributes: ['id', 'handle', 'title', 'description', 'variant_sku', 'thumbnail'],
            filterableAttributes: ['id', 'handle'],
          },
          primaryKey: 'id',
        }
      }
    }
  }
]
// rest of your config...
See how I added it: https://github.com/rpuls/medusajs-2.0-for-railway-boilerplate/blob/master/backend/medusa-config.js
Step 4: Indexing, you don't need to do anything! 🎉
Older versions of this guide had you write subscribers for product create/update/delete events. That is no longer necessary: the plugin ships with its own subscribers for products, variants, categories and more, plus a one-shot job that performs a full index sync about a minute after the (worker) instance starts.
You can also trigger a full re-sync manually at any time from the admin dashboard under Settings -> MeiliSearch, or via POST /admin/meilisearch/sync.
One heads-up for split deployments: subscribers and jobs only run in worker mode. If you run separate server and worker instances, the plugin must be registered on both (if you keep it in your shared medusa-config, you're fine).
That's all for the backend! 🚀
3. Storefront Implementation
If you are using my boilerplate storefront, there is nothing to implement. Search is already wired up, and as of the July 2026 update it uses @meilisearch/instant-meilisearch 0.31+ together with react-instantsearch v7.
If you built search from an older version of the storefront (or this guide), two breaking changes are worth knowing when you upgrade the packages:
- instantMeiliSearch() now returns an object, so destructure it:
const { searchClient } = instantMeiliSearch(endpoint, apiKey) - react-instantsearch-hooks-web is deprecated. The same hooks (InstantSearch, useHits, useSearchBox) now live in react-instantsearch v7, so it's mostly a find-and-replace of the import.
Step 1: Fetch search API key
The request you need to make is:
GET <your_meilisearch_public_url>/keys
Authorization: Bearer <YOUR_MASTER_KEY>
Content-Type: application/json
From the response, locate the "key" field where the "actions" array includes "search". Copy this value—it is your search-only API key. This key should only be used on the frontend as it doesn't give any sensitive permissions.
This key is the only one safe to use in the frontend. Never put your master key or admin key in a NEXT_PUBLIC_ variable, as those are shipped to every visitor's browser.
(If you are using my boilerplate on Railway, you can skip this step. The storefront launcher fetches a search-only key automatically at boot using the MEILISEARCH_API_KEY variable.)
Step 2: Configure Environment Variables
Add these variables to .env.local in your storefront:
# MeiliSearch Configuration
NEXT_PUBLIC_SEARCH_ENDPOINT=http://localhost:7700
NEXT_PUBLIC_SEARCH_API_KEY=<your_search_key>
NEXT_PUBLIC_INDEX_NAME=products
And, if you are also hosting your project on Railway add the following two variables to your Storefront Railway service:
NEXT_PUBLIC_SEARCH_ENDPOINT="https://${{MeiliSearch.MEILI_PUBLIC_URL}}"
NEXT_PUBLIC_SEARCH_API_KEY="<your_search_key>"
NEXT_PUBLIC_INDEX_NAME="products"
All done!
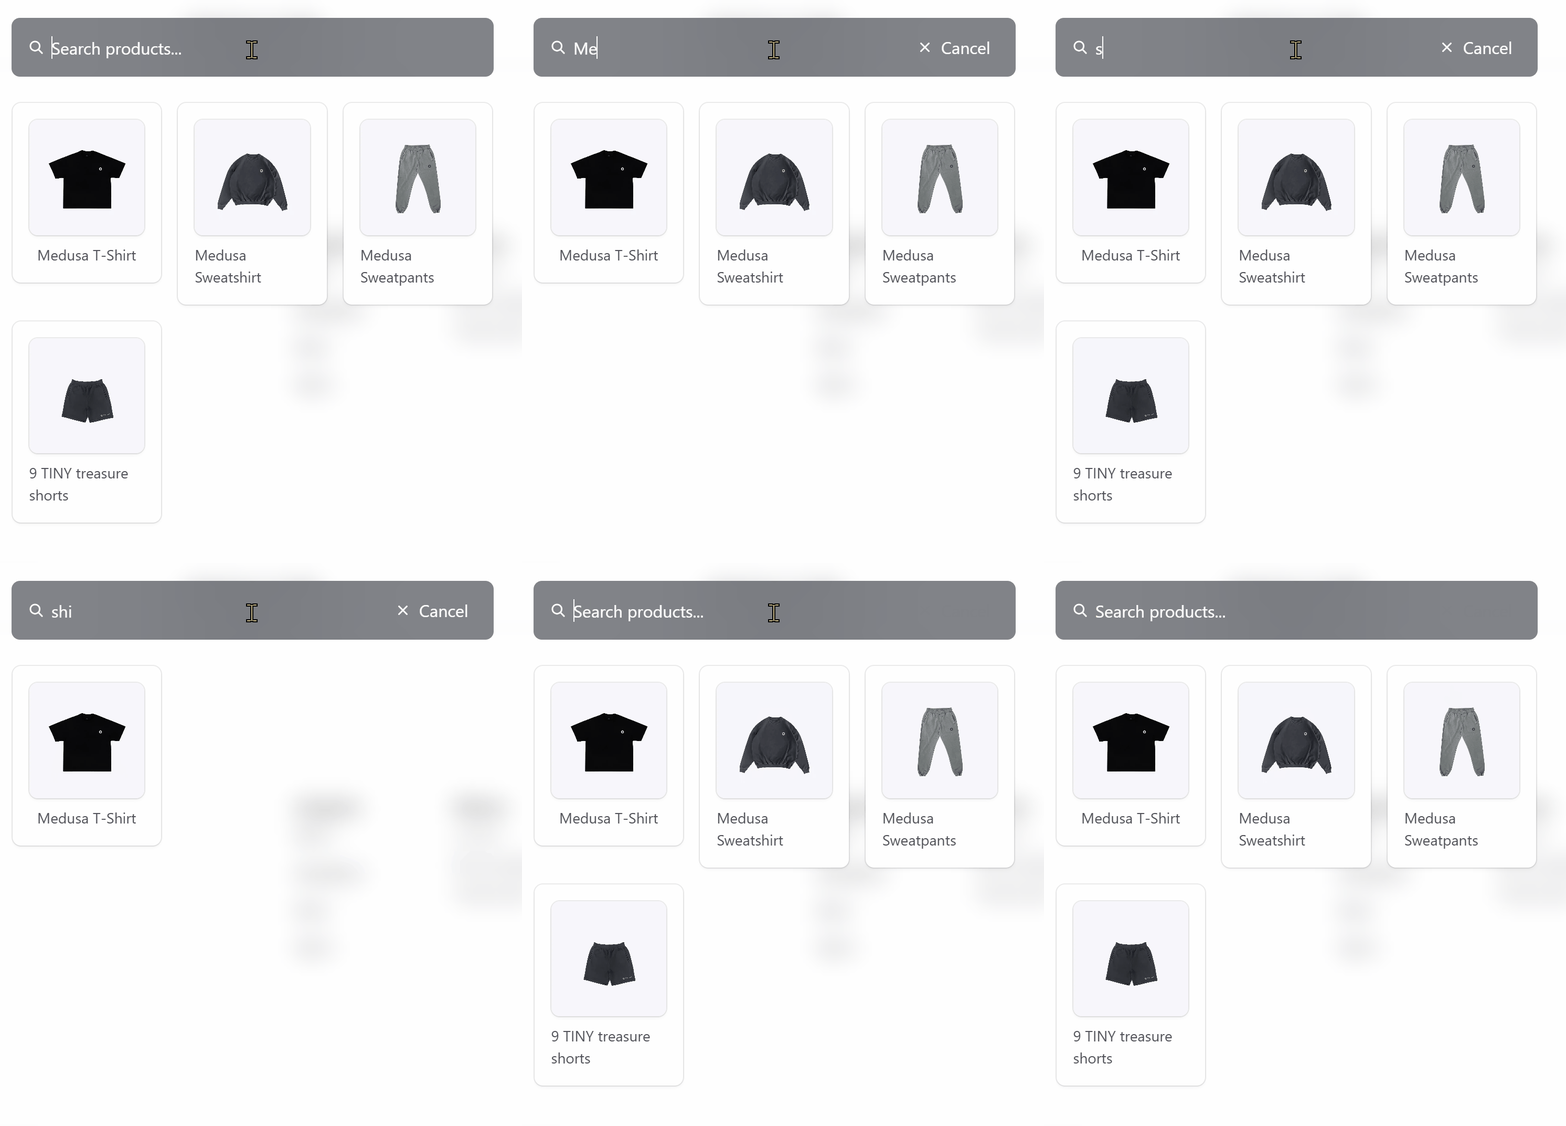
You should now have a fully functional MeiliSearch integration with your Medusa project! Test it out by using the search field in your storefront 🚀
Alternative storefront implementation
Below is a simple React component with an input field and a search button that fetches search results from your MeiliSearch container via its search endpoint:
import React, { useState } from 'react';

const SearchComponent = () => {
  const [query, setQuery] = useState('');
  const [results, setResults] = useState([]);

  // MeiliSearch URL with environment variable fallback
  const meiliSearchUrl = process.env.NEXT_PUBLIC_SEARCH_ENDPOINT || 'http://localhost:7700';
  const searchApiKey = process.env.NEXT_PUBLIC_SEARCH_API_KEY; // Ensure this is set in your environment

  const handleSearch = async () => {
    try {
      const response = await fetch(`${meiliSearchUrl}/indexes/products/search`, {
        method: 'POST',
        headers: {
          'Content-Type': 'application/json',
          'Authorization': `Bearer ${searchApiKey}` // Use the search-only API key
        },
        body: JSON.stringify({ q: query })
      });

      if (!response.ok) {
        throw new Error('Failed to fetch search results');
      }

      const data = await response.json();
      setResults(data.hits);
    } catch (error) {
      console.error(error);
    }
  };

  return (
    <div>
      <input
        type='text'
        value={query}
        onChange={(e) => setQuery(e.target.value)}
        placeholder='Search for products...'
      />
      <button onClick={handleSearch}>Search</button>
      <ul>
        {results.map((result) => (
          <li key={result.id}>{result.title}</li> // Adjust based on your index structure
        ))}
      </ul>
    </div>
  );
};

export default SearchComponent;
In this example, I directly import the API key and MeiliSearch URL from process.env within the component body. However, in real-world React development, it's better to pass these values through a centralized configuration or context. This approach ensures better maintainability and makes it easier to manage environment-specific configurations.