From Print to Play: A 3D-Printed and Handpainted Settlers of Catan Gameboard
Upgrade your Settlers of Catan experience with a 3D-printed and hand-painted gameboard. Magnetic tiles hold the board securely together during play, preventing disruptions. This custom design adds a unique touch to one of my favorite classic games.
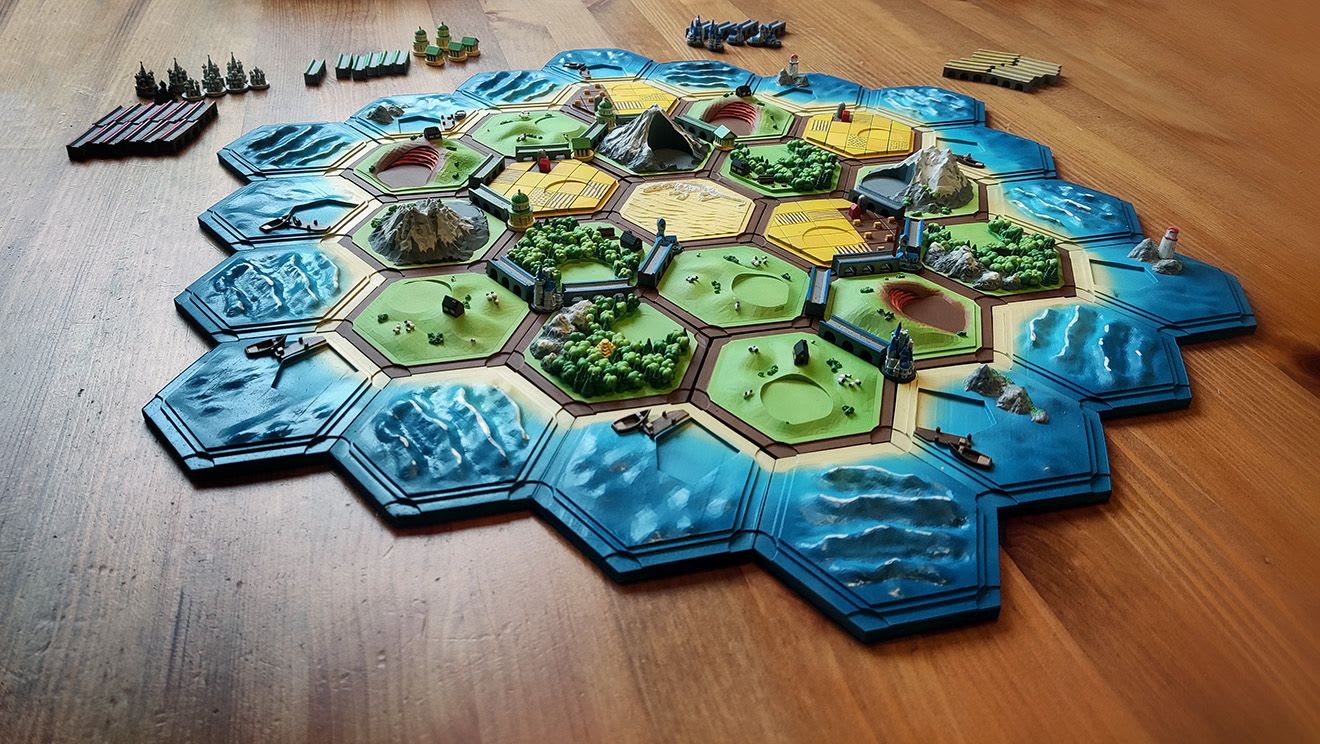
The traditional board game Settlers of Catan is very popular because it combines strategy and luck, while still being realatively easy to play. Despite the popularity, I think it could be even better with an upgrade to the gameboard and playing peieces. This post will feature a custom Settlers of Catan gameboard that was 3D printed and handpainted. Keep in mind that to play, you must still have all of the game cards from the original game.
I spent a lot of time browsing Thingiverse for 3D files to use for my custom gameboard. There are hundreds, if not thousands, of Settlers of Catan-related designs available, and I picked out the ones that I liked the most and thought would fit together well. I used files from several different creators on Thingiverse, and I would like to give credit to the following:
- https://www.thingiverse.com/dakanzla/designs
- https://www.thingiverse.com/ajepuck/designs
- https://www.thingiverse.com/trevorclarke/designs
- https://www.thingiverse.com/explosiveegg/designs
- And more.
It took me about a year to print all the pieces for the gameboard on a resin 3D printer, as I had to pause the project several times while working on other projects as well. This project was very time-consuming, so it was nice to take breaks and work on something else for a change. The total time I used on printing adds up to about 3 days, even thought I made effort to fit as many pieces on the print plate for each print.
Before painting, I had to insert magnets into all the tiles so that they would stay together on the gameboard. I used small ball magnets for this, which the tiles are specifically designed to fit. In total, I used 666 magnets (18 tiles x 36 magnets per tile). Inserting and gluing the magnets took about 6 hours. After inserting and gluing the magnets, I also sanded the bottom of the tiles on a belt sander to make them smoother. And only now, while writing the post I realize that I did not need to fill magnets in the part of the water tiles that makes up the outer perimeter of the board 🤦♂️....
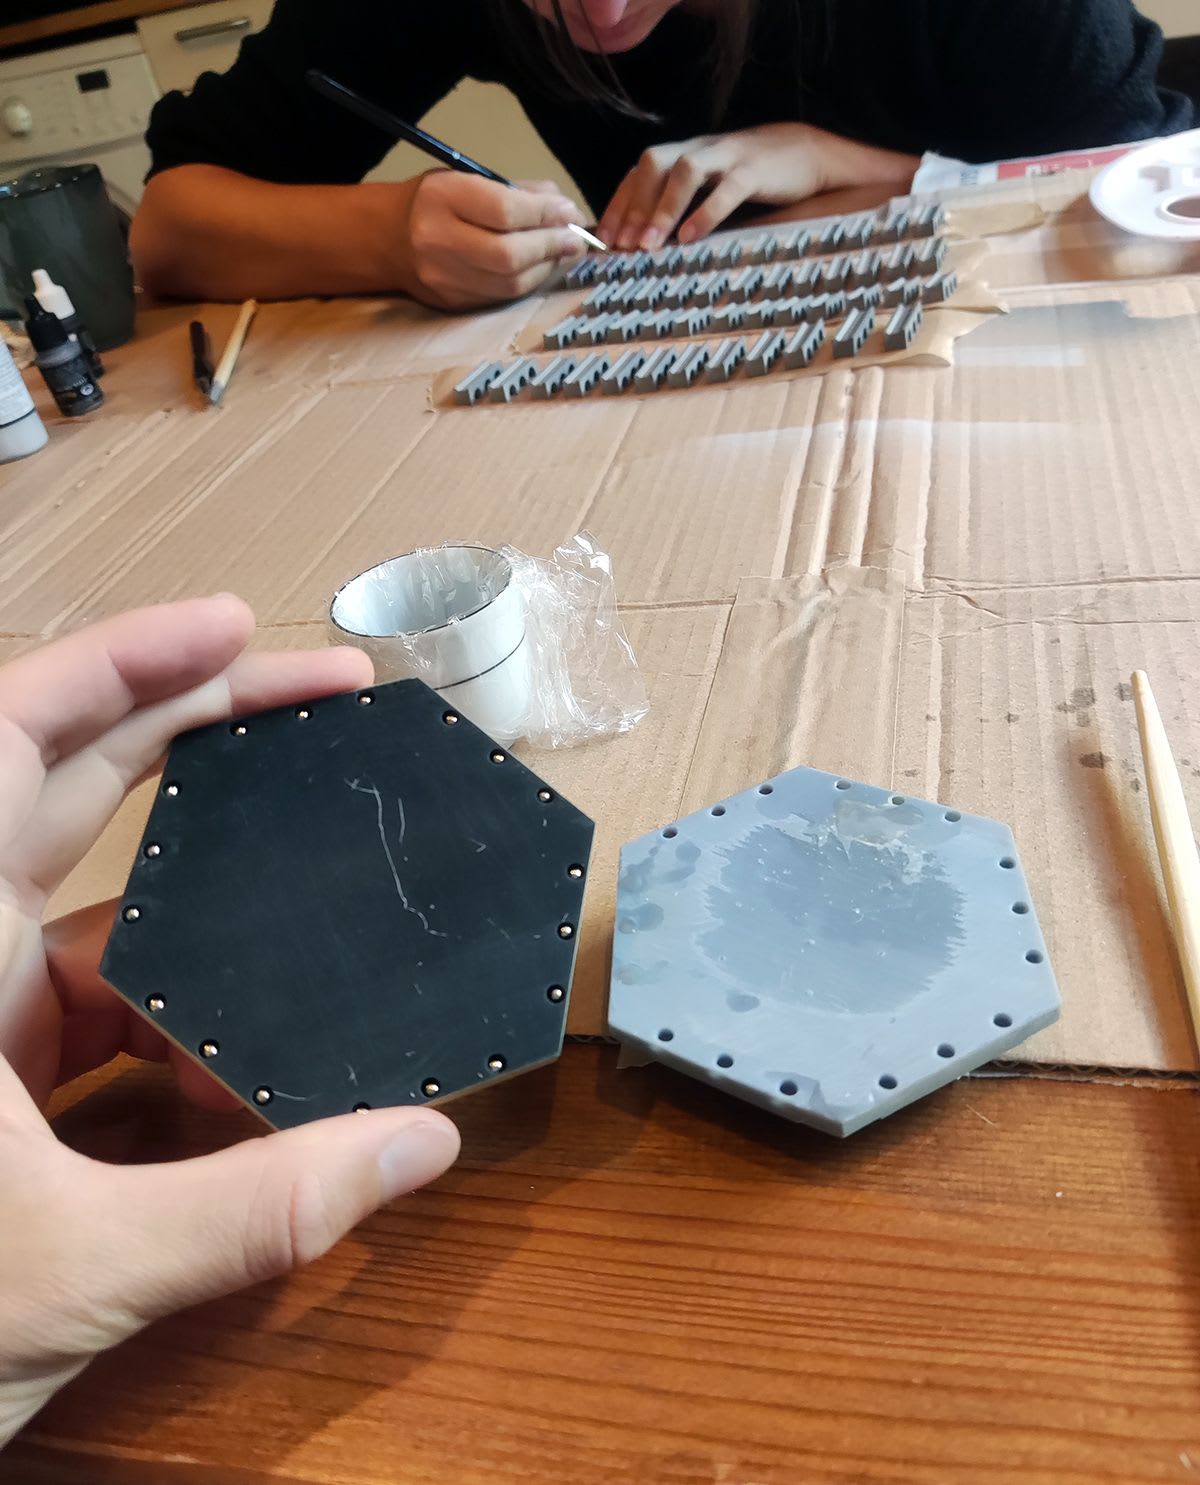
Process of inserting magnets in game board tiles.
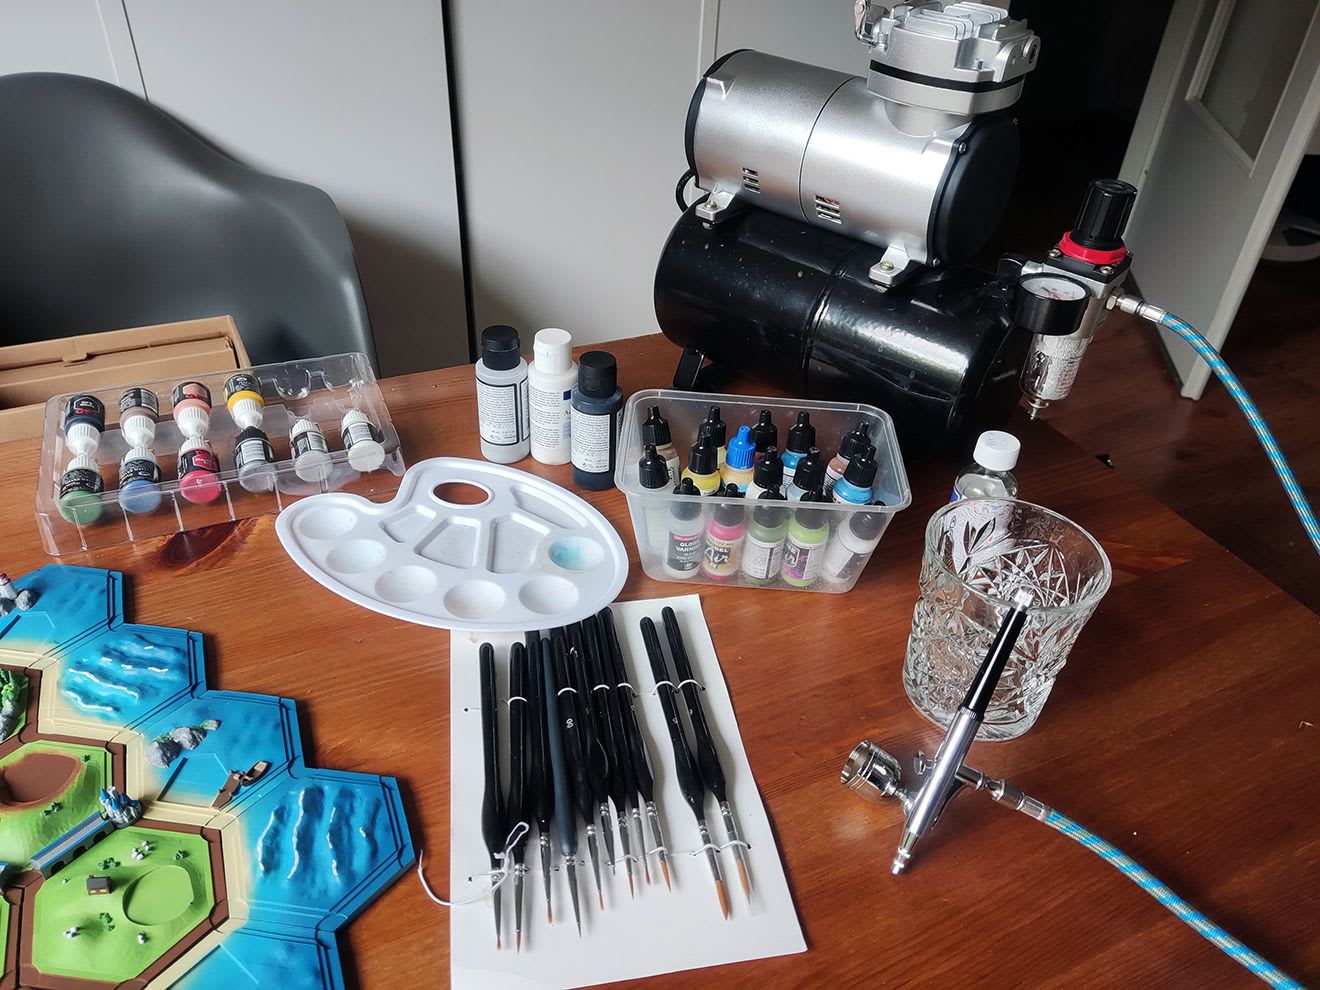
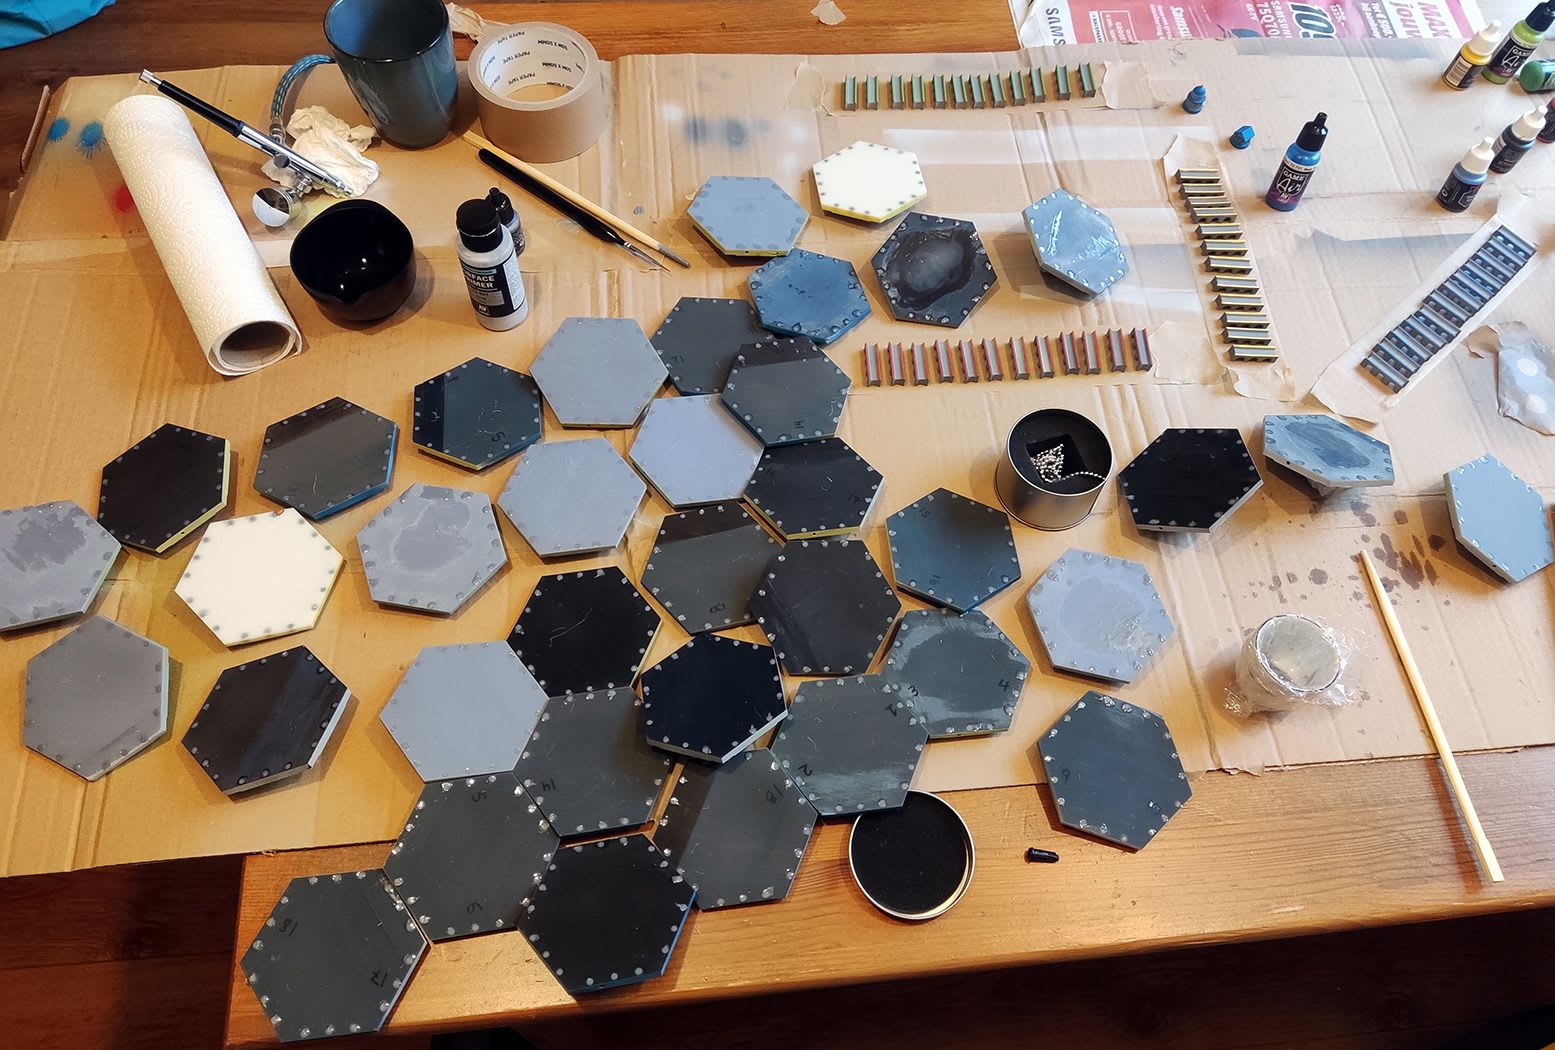
To paint the tiles, I used an airbrush for the primer and to give the pieces a base color. I also used the airbrush to achieve gradient effects, such as on the water tiles. I finished off all the details with a very fine brush. Finally, I sprayed a layer of clear varnish on the water tiles and a layer of matte varnish on everything else. I mainly used airbrush paints from the Vallejo Game line, as these paints can achieve a cartoony look which I was going for.